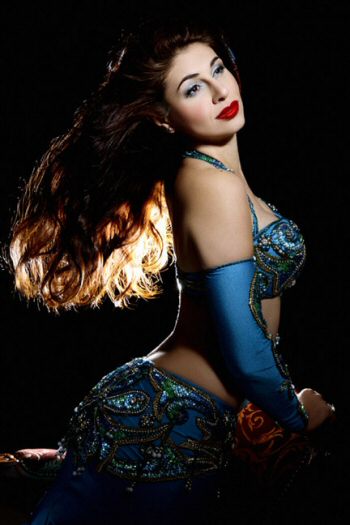
Due to computer issues the last several months, I am finally able to do some updating with a new laptop! Woohoo! The other one decided to stop running properly and I couldn't even get into the log on screen once the computer ran the start up process. So here I am with updates!
I don't recall if this was talked about in any previous posts, but this year I had the opportunity to be an assistant guild mistress for our dancing troupe Banat Tanjora that performs at renaissance faires. It's been an experience in helping the guild mistress in matters of faire and the policies in place as the troupe has been converting from strictly performers to a performance guild that interacts with everyone from visitors to other guilds. It's been fun watching the shift this year as well as helping add 2-3 additional faires to the year's list. For those who wish to catch us in 2014, we'll be at Visalia Renaissance Faire and Fresno's Pirate Faire in May, Hanford Renaissance Faire in October and Kearney Renaissance Faire in November.
I have also had quite the experience this last year and a half under the new teaching of Lydia Fortner-Walker. I went to her in June of 2012 to learn Tribal Fusion and I have learned quite a bit. I had a very pleasant surprise recently in finding out that she had made the recommendation that I be moved from her Level 2 class to her Level 3. This is a significant step for me as the Level 3 class is comprised of advanced students who make up the group Tanjora. So I will begin this next journey at the end of January and I am looking forward to the growth and learning experience.
Currently, I am preparing for 2 performances coming up in the next 3 weeks. This weekend I have a performance at an event called 12th Night which is mostly renaissance faire people. It's a festivity that invites people to dress up from renaissance to steampunk. So Banat Tanjora will be performing at this fun event. The next one I am preparing for is our student recital through California Arts Academy. I have a nice number of dances I am having to practice and refresh myself on, so I am definitely kept busy right now.
I am also preparing for the 2014 Shimmy Mob event that will be taking place on May 10th. For those who don't know, this is an international event to raise awareness to domestic violence. If you are interested in donating or wanting to participate, head over to Shimmy Mob. Early bird registration is $25 until January 15th and will then raise to the regular price of $35. The fees cover access to the choreography and video tutorials as well as the shirts you are to wear for the event. I strongly recommend getting involved if possible as domestic violence hurts everyone, not just the victims. 2013 was the first year I participated and it was such a wonderful experience with the local bellydancers who got involved. This year, myself and another will be leading our city and we are very much looking forward to recruiting people to get involved, learn a new choreography and bonding with those in our community. Should be a lot of fun!
I know I am leaving this blog a little shorter than I had wanted, but I wanted to give a few quick updates since I have been MIA for a while.
I hope you all have an amazing New Year and keep checking back for more content and shared info!
Ryunade
In this blog I will talk about anything and everything going on with bellydancing. Whether that be through what I have experienced, what I will be experiencing, what I have found or anything else I wish to share that is related to bellydancing, it will be done through here.
Tuesday, December 31, 2013
Friday, May 24, 2013
Fears and Anxieties of the Plus Size Dancer Addressed
Hello out there in Bellydance Land! So I have a special topic to cover that is brought up a lot regarding bellydancing. It is ranked up there among the top questions of would-be and beginning bellydancers, and I felt that I should talk about this to help ease concerns, hesitations, fears, and any anxieties. Not to mention that this topic is close to my heart as well.
Plus size bellydancers!
That’s right! This is for all those who are of the plus size category because many of us tend to feel very overshadowed or isolated in some aspect because a lot of people have this idea of what a bellydancer should look like and not what a bellydancer is. I have touched on this topic briefly in one of my earlier posts and thought it would be a good idea to go more into depth about it. This is not only to help educate, but to empower as well.
For plus sized dancers, it is very easy for us to get discouraged in learning this dance form. It is not just because most, if not all, of the students we may be learning with have the “ideal” body type of a bellydancer, which does tend to play one’s psyche. It also has to do with how difficult it is to even find the proper clothing for our size for performances or, in some cases, practice wear. It is almost like pouring lemon juice over a wound. Those of us in the plus size category are looking to feel empowered when we get involved in bellydancing because this dance does help you feel more in tuned with yourself and enjoy an art form that has been around for quite a long time (longer than most dances such as ballet). Many plus sized dancers end up discouraged at one point (or many) and this shouldn’t be the case. Quite honestly, it shouldn’t happen at all. Each dancer is unique and has a lot to gain from this dance. Regardless of what insecurities you may have about yourself, this dance is meant to teach you more about yourself that you may have not have known before. Especially when it comes to your own outlook on your attitude and how you perceive yourself.
One of the biggest issues that plus size bellydancers have is finding proper performance or practice wear. At this point in time, many vendors who sell costuming and practice wear don’t carry anything for the plus size women. Of if they do, they only go up to the lower end of the plus size category. Even those vendors out there that may sell something labeled as an extra-large turns out to be something that runs on the smaller size. Meaning that most of the time it’s a misses extra-large, not a woman’s extra-large. So it leaves a lot of us scrambling to find something that works. Most of the time though, learning how to sew becomes a valuable skill.
The quantity and quality of the costuming also depends on what style of bellydance you are learning. The cabaret style dancing has fewer options for plus size dancers compared to costuming that can be found for tribal style dancing. Because of the limited option for plus size dancers, this is why learning how to sew is encouraged. Simplicity has a number of patterns for plus sizes available for renaissance fair use to tribal. They also have patterns that are close to the cabaret and bollywood look. These patterns you can tweak to make it work for the styles of cabaret and bollywood you are wanting. There are other patterns you can purchase from vendors that are not commercially sold (like the Simplicity Brand) which can be found on some of the bellydance vendors websites, but be advised that these can be a hit and miss in being the correct advertised sizes. Some do claim to be for a woman’s size and end up running close to a misses size. It is advisable to make a mock costume piece with the pattern using cheap material, try it on and then make notes when you go to make the final piece. Last thing you want to do is spend a few hours making a full costume with your desired material only to find that it won’t fit and you don’t have time to fix it before a performance.
Another issue that many dancers, not just those who are plus sized, are scared about is regarding the showing of their midriff. You are not required to have your stomach showing for any style of bellydance. If you are insecure about your body or feel it is inappropriate to show off that much skin, there are plenty of costuming/clothing options to keep your midriff out of sight. Wearing a leotard under your costuming, creating temporary covers tacked in place, making a one piece dress, full length blouses, etc., are all options that are acceptable. The issue of the midriff is something that most people use as one of the reason why they are not comfortable learning this dance and this is effects most plus sized people. Even for practice, you are not expected to show skin. Only those who are comfortable or are instructing will do so to better see their movement when working on bodywaves or how chest lifts affect the abs and ribcage.
So how do we come to terms with ourselves in order to enjoy this dance?
Well the first step is always the most difficult one for some who already suffer from some sort of negative self-image or fear. You need to love yourself. By understanding that being a different size is not a negative thing will help you overcome some of your apprehensions. Size honestly doesn’t play a factor once you begin dancing because if you are enjoying what you are doing, it shows more than what you look like. Most of the time, plus size bellydancers are more enjoyable to watch than those who fit the ideal look. Why is that? Because invoking the mood of the dance is what people connect to, not the shape of the dancer. Besides, it is usually the shallow and judgmental people who choose to focus on one’s body rather than one’s personality or expression of the dance. So why waste time worrying about those people when their opinions are of little consequence or don’t matter? It’s those who have a love of the dance and who support you that count as well as how good you feel when you dance.
Next step is to understand that there are just some moves that you can’t do as well as others. Everyone’s body has some dance step or movement it is unable to perform because of how your body is built. This shouldn’t be used as an excuse or as a reason for discouragement. Even those who are thin can’t do a movement because their bone structure doesn’t allow it. I know a dancer who is in shape and she has problems doing a simple maya because her bone structure doesn’t allow the hip to move away from the ribcage properly. She has to slide out her hip first before moving it up for the movement. Altering the move a little is acceptable to be able to perform it based on what your body can do. For me, certain shimmies are hard to do because I do have extra meat on my thighs. I can’t bring my legs together to execute certain shimmies others are able to do. So I compromise by bringing in my legs as close as comfortably possible and do what I can. As long as the instructor knows you are doing your best and doing what your body allows, there is nothing to worry about. Even those with disabilities who enjoy bellydancing do make compromises so the dance works for their body type. You make the dance work for you. It should never be the other way around where you are hurting yourself to fit the dance.
The final step is to confront your fears, hesitations and excuses. Once you have done so, you will find that learning bellydancing is a lot easier because your mind will not be so quick to throw up roadblocks and hinder you from learning something new. Going with the flow, doing your best, being patient and keeping an open mind on how to learn a move is what keeps you moving forward and getting the most out of this art form. Don’t be so quick to judge yourself as being incompetent or a disgrace if you are not getting something. Remember that it does take time to learn the movement and that you always have your instructor to go to when you are unsure if you are learning something correctly. Your instructor is there to give you pointers on what would work best for you and give you a positive critique on your movement. If you are embarrassed to say something in class, you can always ask the instructor to look at the movement you are concerned about before or after class so you have that one-on-one time without others overhearing or watching. Also remember that even asking in class may help someone else who is possibly having the same doubt or issue you may be having. There have been times where I was embarrassed about asking how a movement works in class to only find out that there were at least 2 other people who were having the same issues. So never feel ashamed in not understanding how a move works as there is always someone else who is not understanding the mechanics of the move or had been learning it wrong based on their observation instead of asking.
There is one thing I would like to note on something I had mentioned earlier in regards to making the dance work for your body. As I had stated, you are allowed to alter some of the movements so that you can do them easier, but you cannot ignore or gloss over the required dance form, meaning that you still need to keep everything open, shapely and free. Don’t let your arms sag if you had to alter a chest movement, they should still be out away from the body in order to frame the move. If you have to alter a hip movement, keep your tailbone tucked. You are still adhering to the body basics and structure that allows you to move in this dance while creating a variation of a move in order to work better for you.
If you have friends who are looking into learning bellydancing but are afraid to jump right into a class, have them come to events with you that has open floor dancing (such as haflas), renaissance faires that have dancers who offer free mini classes, or any free/discounted classes that your instructor might be offering as a promotion for her teaching. I would also suggest going with your friends to help ease their anxiety. This opportunity should not be used to show off your abilities. Your friends are already aware of what you can do and rubbing it in can turn your friends away from learning. You need to use this opportunity to explain that you are always happy to go as support for friends who are interested and that you also use these chances to recheck your basics (which is not a bad thing for you to go over every now and then to make sure your dancing isn’t becoming sloppy). The last thing your friend wants to experience during their first time attending a lesson is the feeling of neglect or being overshadowed by a more experienced dancer as they are the ones who are learning something you already know. They should have the special attention from the instructor during the class and your role is to give your friend encouraging statements and positive feedback.
Plus size bellydancers!
That’s right! This is for all those who are of the plus size category because many of us tend to feel very overshadowed or isolated in some aspect because a lot of people have this idea of what a bellydancer should look like and not what a bellydancer is. I have touched on this topic briefly in one of my earlier posts and thought it would be a good idea to go more into depth about it. This is not only to help educate, but to empower as well.
For plus sized dancers, it is very easy for us to get discouraged in learning this dance form. It is not just because most, if not all, of the students we may be learning with have the “ideal” body type of a bellydancer, which does tend to play one’s psyche. It also has to do with how difficult it is to even find the proper clothing for our size for performances or, in some cases, practice wear. It is almost like pouring lemon juice over a wound. Those of us in the plus size category are looking to feel empowered when we get involved in bellydancing because this dance does help you feel more in tuned with yourself and enjoy an art form that has been around for quite a long time (longer than most dances such as ballet). Many plus sized dancers end up discouraged at one point (or many) and this shouldn’t be the case. Quite honestly, it shouldn’t happen at all. Each dancer is unique and has a lot to gain from this dance. Regardless of what insecurities you may have about yourself, this dance is meant to teach you more about yourself that you may have not have known before. Especially when it comes to your own outlook on your attitude and how you perceive yourself.
One of the biggest issues that plus size bellydancers have is finding proper performance or practice wear. At this point in time, many vendors who sell costuming and practice wear don’t carry anything for the plus size women. Of if they do, they only go up to the lower end of the plus size category. Even those vendors out there that may sell something labeled as an extra-large turns out to be something that runs on the smaller size. Meaning that most of the time it’s a misses extra-large, not a woman’s extra-large. So it leaves a lot of us scrambling to find something that works. Most of the time though, learning how to sew becomes a valuable skill.
The quantity and quality of the costuming also depends on what style of bellydance you are learning. The cabaret style dancing has fewer options for plus size dancers compared to costuming that can be found for tribal style dancing. Because of the limited option for plus size dancers, this is why learning how to sew is encouraged. Simplicity has a number of patterns for plus sizes available for renaissance fair use to tribal. They also have patterns that are close to the cabaret and bollywood look. These patterns you can tweak to make it work for the styles of cabaret and bollywood you are wanting. There are other patterns you can purchase from vendors that are not commercially sold (like the Simplicity Brand) which can be found on some of the bellydance vendors websites, but be advised that these can be a hit and miss in being the correct advertised sizes. Some do claim to be for a woman’s size and end up running close to a misses size. It is advisable to make a mock costume piece with the pattern using cheap material, try it on and then make notes when you go to make the final piece. Last thing you want to do is spend a few hours making a full costume with your desired material only to find that it won’t fit and you don’t have time to fix it before a performance.
Another issue that many dancers, not just those who are plus sized, are scared about is regarding the showing of their midriff. You are not required to have your stomach showing for any style of bellydance. If you are insecure about your body or feel it is inappropriate to show off that much skin, there are plenty of costuming/clothing options to keep your midriff out of sight. Wearing a leotard under your costuming, creating temporary covers tacked in place, making a one piece dress, full length blouses, etc., are all options that are acceptable. The issue of the midriff is something that most people use as one of the reason why they are not comfortable learning this dance and this is effects most plus sized people. Even for practice, you are not expected to show skin. Only those who are comfortable or are instructing will do so to better see their movement when working on bodywaves or how chest lifts affect the abs and ribcage.
So how do we come to terms with ourselves in order to enjoy this dance?
Well the first step is always the most difficult one for some who already suffer from some sort of negative self-image or fear. You need to love yourself. By understanding that being a different size is not a negative thing will help you overcome some of your apprehensions. Size honestly doesn’t play a factor once you begin dancing because if you are enjoying what you are doing, it shows more than what you look like. Most of the time, plus size bellydancers are more enjoyable to watch than those who fit the ideal look. Why is that? Because invoking the mood of the dance is what people connect to, not the shape of the dancer. Besides, it is usually the shallow and judgmental people who choose to focus on one’s body rather than one’s personality or expression of the dance. So why waste time worrying about those people when their opinions are of little consequence or don’t matter? It’s those who have a love of the dance and who support you that count as well as how good you feel when you dance.
Next step is to understand that there are just some moves that you can’t do as well as others. Everyone’s body has some dance step or movement it is unable to perform because of how your body is built. This shouldn’t be used as an excuse or as a reason for discouragement. Even those who are thin can’t do a movement because their bone structure doesn’t allow it. I know a dancer who is in shape and she has problems doing a simple maya because her bone structure doesn’t allow the hip to move away from the ribcage properly. She has to slide out her hip first before moving it up for the movement. Altering the move a little is acceptable to be able to perform it based on what your body can do. For me, certain shimmies are hard to do because I do have extra meat on my thighs. I can’t bring my legs together to execute certain shimmies others are able to do. So I compromise by bringing in my legs as close as comfortably possible and do what I can. As long as the instructor knows you are doing your best and doing what your body allows, there is nothing to worry about. Even those with disabilities who enjoy bellydancing do make compromises so the dance works for their body type. You make the dance work for you. It should never be the other way around where you are hurting yourself to fit the dance.
The final step is to confront your fears, hesitations and excuses. Once you have done so, you will find that learning bellydancing is a lot easier because your mind will not be so quick to throw up roadblocks and hinder you from learning something new. Going with the flow, doing your best, being patient and keeping an open mind on how to learn a move is what keeps you moving forward and getting the most out of this art form. Don’t be so quick to judge yourself as being incompetent or a disgrace if you are not getting something. Remember that it does take time to learn the movement and that you always have your instructor to go to when you are unsure if you are learning something correctly. Your instructor is there to give you pointers on what would work best for you and give you a positive critique on your movement. If you are embarrassed to say something in class, you can always ask the instructor to look at the movement you are concerned about before or after class so you have that one-on-one time without others overhearing or watching. Also remember that even asking in class may help someone else who is possibly having the same doubt or issue you may be having. There have been times where I was embarrassed about asking how a movement works in class to only find out that there were at least 2 other people who were having the same issues. So never feel ashamed in not understanding how a move works as there is always someone else who is not understanding the mechanics of the move or had been learning it wrong based on their observation instead of asking.
There is one thing I would like to note on something I had mentioned earlier in regards to making the dance work for your body. As I had stated, you are allowed to alter some of the movements so that you can do them easier, but you cannot ignore or gloss over the required dance form, meaning that you still need to keep everything open, shapely and free. Don’t let your arms sag if you had to alter a chest movement, they should still be out away from the body in order to frame the move. If you have to alter a hip movement, keep your tailbone tucked. You are still adhering to the body basics and structure that allows you to move in this dance while creating a variation of a move in order to work better for you.
If you have friends who are looking into learning bellydancing but are afraid to jump right into a class, have them come to events with you that has open floor dancing (such as haflas), renaissance faires that have dancers who offer free mini classes, or any free/discounted classes that your instructor might be offering as a promotion for her teaching. I would also suggest going with your friends to help ease their anxiety. This opportunity should not be used to show off your abilities. Your friends are already aware of what you can do and rubbing it in can turn your friends away from learning. You need to use this opportunity to explain that you are always happy to go as support for friends who are interested and that you also use these chances to recheck your basics (which is not a bad thing for you to go over every now and then to make sure your dancing isn’t becoming sloppy). The last thing your friend wants to experience during their first time attending a lesson is the feeling of neglect or being overshadowed by a more experienced dancer as they are the ones who are learning something you already know. They should have the special attention from the instructor during the class and your role is to give your friend encouraging statements and positive feedback.
Sunday, February 24, 2013
Performance Video and Pictures of the Student Recital and Winter Hafla
For your viewing pleasure, here is some video of my student recital and the Belly Dance Coalition of the San Joaquin Valley Winter Hafla.
In this video, you are watching the Level 2 class with a few of the Level 3 students dancing to the first dance and then strictly the Level 2 students and my instructor dancing to the second dance. The last half of the video features the Level 3 students who are members of the performing group Tanjora. Not all the Level 3 students were present as many of them are involved in other groups as well who may have had other engagements to be at that were scheduled for the same date.
As future video becomes available on performances, I'll be sure to share with everyone for you all to enjoy.
Here are some pictures of the Winter Hafla for you to enjoy as well. These pictures feature many dancers from Fresno, Madera, Visalia and Hanford who came together to enjoy students of varying levels in a relaxed atmosphere. Pictures are courtesy of the very talented Andalee, who you can see dancing during an intermission with her daughter Betty and her other daughter who is grooving along in her mother's tummy.


As soon as I am able to, I will add 1 more video from the student recital and 3 more from the winter hafla.
In this video, you are watching the Level 2 class with a few of the Level 3 students dancing to the first dance and then strictly the Level 2 students and my instructor dancing to the second dance. The last half of the video features the Level 3 students who are members of the performing group Tanjora. Not all the Level 3 students were present as many of them are involved in other groups as well who may have had other engagements to be at that were scheduled for the same date.
As future video becomes available on performances, I'll be sure to share with everyone for you all to enjoy.
Here are some pictures of the Winter Hafla for you to enjoy as well. These pictures feature many dancers from Fresno, Madera, Visalia and Hanford who came together to enjoy students of varying levels in a relaxed atmosphere. Pictures are courtesy of the very talented Andalee, who you can see dancing during an intermission with her daughter Betty and her other daughter who is grooving along in her mother's tummy.


As soon as I am able to, I will add 1 more video from the student recital and 3 more from the winter hafla.
Sunday, January 20, 2013
Recital, Winter Hafla, and Other Events
This last week has been very busy. Last weekend I performed for my first recital under my instructor at California Arts Academy. It went very well and had the opportunity to share stage time in one choreography piece with members of the Level 3 performing group, Tanjora. It was a lot of fun and I had a friend come down from Davis, CA to finally see me perform after 3 years of trying to get them down for a performance. So last weekend was a lot of fun in watching the kids level, Level 1 and Level 3 perform along with solos from my instructor and students from the Level 3 class.
Earlier today our local bellydance community, the Bellydance Coalition of San Joaquin Valley, had our first Hafla. It went very well with several dancers visiting and dancing. We had several solos from many dancers, a few troupe performances as well as the debut of Brazen Tassel, the new local ATS group certified by Carol herself of Fat Chance Bellydance. It was a great opportunity to see all the styles available in our community and even enjoyed a song by one of our dancers that has been learning Middle Eastern songs in the native tongue. It was quite a treat!
Some upcoming events that will be taking place, Fresno's 2013 Rogue Show will begin in March. This will be the first time since I began dancing that I will not be participating, but I am quite alright with that. It gives me the opportunity to see local bellydance groups perform in support of their art as well as allowing me the chance to continue learning without the pressure of dancing a style I am not fully knowledgable in just yet. So sitting out of the Rogue until my instructor feels I'm ready to be brought up is alright with me! But for those who may be in the area that wish to check out some of the performances, I'll be posting the schedule soon for the bellydancing shows.
Currently members in the area are preparing to participate in this year's Shimmy Mob that will take place in May. This is a world wide event that helps promote awareness and raise funds for shelters that house women and children of abuse. So if you are interested in registering to participate in this event, go to www.shimmymob.com. Once registered, you will have access to choreography, videos that break down the choreography for all levels as well as additional information on the event as updates come out. For those who are in the Central Valley of California, Crystal Ravenwolf is our team leader. So when you register, be sure to do so as dancer and find her under the Fresno, CA listing of participating cities to partake in our group. Deadline to register is April 5th I believe.
This week is also the start of the new semester at California Arts Academy. Since Banat Tanjora received permission to partake in 2 extra renaissance fairs this year, we'll be taking time in class to work on more improvising to allow everyone the chance to dance when we go to the fairs. Our first fair is Visalia Renaissance Fair April 20th-21st. Then we'll have the Fresno Pirate Fair in May and close out the fair season at Kearney Park for the Kearney Renaissance Fair in November. So many of us are excited about the upcoming fair schedule and look forward to having a fun time. If you come to one of these fairs, come say hi and enjoy what we have to offer at our encampment! We'll be at these fairs all weekend along.
For your viewing pleasure, here are videos of the 2011 and 2012 Shimmy Mob!
Shimmy Mob 2011
Shimmy Mob 2012
Earlier today our local bellydance community, the Bellydance Coalition of San Joaquin Valley, had our first Hafla. It went very well with several dancers visiting and dancing. We had several solos from many dancers, a few troupe performances as well as the debut of Brazen Tassel, the new local ATS group certified by Carol herself of Fat Chance Bellydance. It was a great opportunity to see all the styles available in our community and even enjoyed a song by one of our dancers that has been learning Middle Eastern songs in the native tongue. It was quite a treat!
Some upcoming events that will be taking place, Fresno's 2013 Rogue Show will begin in March. This will be the first time since I began dancing that I will not be participating, but I am quite alright with that. It gives me the opportunity to see local bellydance groups perform in support of their art as well as allowing me the chance to continue learning without the pressure of dancing a style I am not fully knowledgable in just yet. So sitting out of the Rogue until my instructor feels I'm ready to be brought up is alright with me! But for those who may be in the area that wish to check out some of the performances, I'll be posting the schedule soon for the bellydancing shows.
Currently members in the area are preparing to participate in this year's Shimmy Mob that will take place in May. This is a world wide event that helps promote awareness and raise funds for shelters that house women and children of abuse. So if you are interested in registering to participate in this event, go to www.shimmymob.com. Once registered, you will have access to choreography, videos that break down the choreography for all levels as well as additional information on the event as updates come out. For those who are in the Central Valley of California, Crystal Ravenwolf is our team leader. So when you register, be sure to do so as dancer and find her under the Fresno, CA listing of participating cities to partake in our group. Deadline to register is April 5th I believe.
This week is also the start of the new semester at California Arts Academy. Since Banat Tanjora received permission to partake in 2 extra renaissance fairs this year, we'll be taking time in class to work on more improvising to allow everyone the chance to dance when we go to the fairs. Our first fair is Visalia Renaissance Fair April 20th-21st. Then we'll have the Fresno Pirate Fair in May and close out the fair season at Kearney Park for the Kearney Renaissance Fair in November. So many of us are excited about the upcoming fair schedule and look forward to having a fun time. If you come to one of these fairs, come say hi and enjoy what we have to offer at our encampment! We'll be at these fairs all weekend along.
For your viewing pleasure, here are videos of the 2011 and 2012 Shimmy Mob!
Shimmy Mob 2011
Shimmy Mob 2012
Monday, November 19, 2012
The San Joaquin Valley Bellydance Coalition: It Begins!
So I would have wrote about this last night, but I was too tired to really discuss the exciting changes that are going on in the Central Valley. An invite had been sent out by a few key people here in the Central Valley for a meeting to take place within the local bellydance community. Several members (from beginning to professional) came to the meeting. Now this is actually a good start as this meeting was of a special kind. It was the first meeting of the San Joaquin Valley Bellydance Coalition aka The Coalition. The board committee of this group was being led by nationally known dancer Andalee. Essentially this meeting was to gather as many of the local dancers as possible to discuss ways to bring our community closer together, to promote each others performances, workshops and seminars, as well as brain storm how to educate the public a little more about each style of dance our community has. At the meeting people had agreed that it was time to pull ourselves together and work to bring a better awareness of the bellydance art and it's culture to people as there is still a misunderstanding of what bellydance is. Many people still believe this art to be adult entertainment due to how movies and other media has played a role in demonizing, so to speak, the art. So as our first meeting got underway, it was pretty clear everyone was on the same page to educate the Central Valley on what bellydancing is and to help our local cities embrace the history of the art in their neck of the woods.
In order to discuss the ideas we all had at this meeting, we broke up into groups and discussed amongst ourselves what we wanted more of. It was surprising that the top 3 priorities listed from each group was community outreach programs, social gatherings and better opportunities to attend workshops that are not readily available. The outreach programs was always listed as number one in each group. So it was very nice to see how all of us were on the same page and it shows that many dancers in the area have discussed at one point or another how our community needs to be in a more positive and educational role in order for our art to survive.
So I am pleased to share that over the next few years, there will be a new change taking place in the Central Valley to offer the public opportunities to learn the culture, dance, and positive role bellydancing has to offer in hopes to keep the art going and break down the walls of any misconceptions people have about this dance. It will be very exciting to see!
As more information develops, I will be sharing it here so those who are local or those in other cities/towns/states who wish to participate in the change can do so to help promote the art and culture in their own communities.
In order to discuss the ideas we all had at this meeting, we broke up into groups and discussed amongst ourselves what we wanted more of. It was surprising that the top 3 priorities listed from each group was community outreach programs, social gatherings and better opportunities to attend workshops that are not readily available. The outreach programs was always listed as number one in each group. So it was very nice to see how all of us were on the same page and it shows that many dancers in the area have discussed at one point or another how our community needs to be in a more positive and educational role in order for our art to survive.
So I am pleased to share that over the next few years, there will be a new change taking place in the Central Valley to offer the public opportunities to learn the culture, dance, and positive role bellydancing has to offer in hopes to keep the art going and break down the walls of any misconceptions people have about this dance. It will be very exciting to see!
As more information develops, I will be sharing it here so those who are local or those in other cities/towns/states who wish to participate in the change can do so to help promote the art and culture in their own communities.
Sunday, November 18, 2012
Wrist/Hand Exercises and Movements
I thought it would be a good idea to post some videos on some wrist and hand exercises you can work on at home, at work, waiting at an appointment or just about anywhere you can think on. Doing these exercises at work would not only help train yourself to have graceful wrists for bellydancing, but it would also help easing stress, especially carpal tunnel, in the wrists if you are doing a desk job that requires you to sit at a computer all day.
I felt it would be a good idea to present some videos for you to try out as wrist and hand exercises are not fully covered a lot of the time by several bellydance instructors. There may be some instruction on hand movement, but sometimes you may come across instructors that would expect it to come naturally or would expect you to learn on your own. I have an instructor who demonstrates wrist and hand movements as we work on combos, so I am lucky in that aspect. So for those who may have an instructor who doesn't cover exercises for your wrists and hands, please enjoy the videos below.
*NOTE: One of the videos found were disabled for embedding so please follow the link*
Hand Exercises for Belly Dancers <--- Click here to see video!
I hope these videos help you with your hand movements and remember to be patient! Like all movements it may take time to build the flexibility and grace, so do not be discouraged as you work on each of the exercises and movements presented above. Be sure that as you practice some of these movements that you do keep proper arm positions. Some of these do not require you to have your arms out away from the body, such as the hand undulations, but others may require you to have your arms out at certain positions to achieve the effect each video covers. Always be sure to keep your arms out in a bent and relaxed position, whether your arms are out at about the shoulder level for American Tribal Style and Cabaret/Oriental (which arms will be a little lower than shoulder level), or more down around your ribcage level if you are in the tribal fusion style in order to keep your body framed properly. If you allow your arms to drop where your wrists are down at your waist or hips while you are dancing, your dance presence drops and it looks like you have weak arms. That is not something that you want as bellydancing is about having a strong presence to capture your audience's attention.
Until next time!
I felt it would be a good idea to present some videos for you to try out as wrist and hand exercises are not fully covered a lot of the time by several bellydance instructors. There may be some instruction on hand movement, but sometimes you may come across instructors that would expect it to come naturally or would expect you to learn on your own. I have an instructor who demonstrates wrist and hand movements as we work on combos, so I am lucky in that aspect. So for those who may have an instructor who doesn't cover exercises for your wrists and hands, please enjoy the videos below.
*NOTE: One of the videos found were disabled for embedding so please follow the link*
Hand Exercises for Belly Dancers <--- Click here to see video!
I hope these videos help you with your hand movements and remember to be patient! Like all movements it may take time to build the flexibility and grace, so do not be discouraged as you work on each of the exercises and movements presented above. Be sure that as you practice some of these movements that you do keep proper arm positions. Some of these do not require you to have your arms out away from the body, such as the hand undulations, but others may require you to have your arms out at certain positions to achieve the effect each video covers. Always be sure to keep your arms out in a bent and relaxed position, whether your arms are out at about the shoulder level for American Tribal Style and Cabaret/Oriental (which arms will be a little lower than shoulder level), or more down around your ribcage level if you are in the tribal fusion style in order to keep your body framed properly. If you allow your arms to drop where your wrists are down at your waist or hips while you are dancing, your dance presence drops and it looks like you have weak arms. That is not something that you want as bellydancing is about having a strong presence to capture your audience's attention.
Until next time!
Friday, November 9, 2012
Sewing, ITS Dancing, and that Irish Feeling
What a busy week this has been for dancing. Purchased navy blue linen last weekend to make a ghawazee blouse to dance in for this weekend's renaissance faire. I couldn't find a pattern to use for the blouse and I didn't have enough time to order one online since the blouse needed to be completed within the week. So I took one of the ghawazee coat patterns and altered it slightly to make a blouse. I was able to succeed and now have a blouse to wear that is renaissance period appropriate. As I continue to make my costumes, the better I get with altering things to my needs.
My dance class also spent this week's lesson in learning how to improv dance (ITS - Improv Tribal Style) in a group for this weekend. We learned how to watch for queues off each other as we took turns leading the group before transitioning to the next person. It was pretty fun and it has me a little more prepared for what is in store this weekend. The last time I joined this group was for a weekend during another renaissance faire but only participated in providing live drums and improv solo dancing. This time around, since I am now a member of the group, I was given a quick run down on what we would be doing to entertain ourselves and those who came to be entertained. Considering that we are expecting intermittent showers tomorrow and it will be cold, my instructor has come up with a plan to keep us busy so we stay warm. Taking shifts to dance improve-style, teaching anyone interested how to dance, drum, games, etc. Should be a fun weekend!
In other news, in about 2 months an informal student recital will be taking place to showcase the Level 1, Level 2 and Level 3 students with solos from the Level 3 students and instructor. I'm getting excited for this as well as nervous because it's not just showcasing dances, but there are other smaller activities planned as well that is also....dun dun dun.....improv dancing. If I'm alone and in front of several people, I choke a little. My mind goes blank with improv dancing alone in front of several people and a lot of it is due to not being use to being in a situation like that. I've done it only twice before in the previous group I was with but it was in a different style. So I will set aside time between now and January to do some improv dancing in the privacy of my home to kind of prepare myself a little.
Lastly, about 4 weeks ago I went to pick up a yoga DVD to help with flexibility and strength. I am a little frustrated though because I still have yet to break out the DVD and start learning from it. The only reason I am not guilty with myself just yet for not starting a routine is due to getting sick the day after I purchased the DVD and then I exhausted myself with a temporary job that left me voiceless and tired. So I'm still recovering from the job and being sick. Once I am close to 100%, I'll start learning yoga, but until then I gotta work on getting over being ill and recover from the stress injuries of the temporary job I had.
Now off to get some rest. Gotta get up early and start the whole dressing process and be on faire site by 9am. Here is a video for your enjoyment!
My dance class also spent this week's lesson in learning how to improv dance (ITS - Improv Tribal Style) in a group for this weekend. We learned how to watch for queues off each other as we took turns leading the group before transitioning to the next person. It was pretty fun and it has me a little more prepared for what is in store this weekend. The last time I joined this group was for a weekend during another renaissance faire but only participated in providing live drums and improv solo dancing. This time around, since I am now a member of the group, I was given a quick run down on what we would be doing to entertain ourselves and those who came to be entertained. Considering that we are expecting intermittent showers tomorrow and it will be cold, my instructor has come up with a plan to keep us busy so we stay warm. Taking shifts to dance improve-style, teaching anyone interested how to dance, drum, games, etc. Should be a fun weekend!
In other news, in about 2 months an informal student recital will be taking place to showcase the Level 1, Level 2 and Level 3 students with solos from the Level 3 students and instructor. I'm getting excited for this as well as nervous because it's not just showcasing dances, but there are other smaller activities planned as well that is also....dun dun dun.....improv dancing. If I'm alone and in front of several people, I choke a little. My mind goes blank with improv dancing alone in front of several people and a lot of it is due to not being use to being in a situation like that. I've done it only twice before in the previous group I was with but it was in a different style. So I will set aside time between now and January to do some improv dancing in the privacy of my home to kind of prepare myself a little.
Lastly, about 4 weeks ago I went to pick up a yoga DVD to help with flexibility and strength. I am a little frustrated though because I still have yet to break out the DVD and start learning from it. The only reason I am not guilty with myself just yet for not starting a routine is due to getting sick the day after I purchased the DVD and then I exhausted myself with a temporary job that left me voiceless and tired. So I'm still recovering from the job and being sick. Once I am close to 100%, I'll start learning yoga, but until then I gotta work on getting over being ill and recover from the stress injuries of the temporary job I had.
Now off to get some rest. Gotta get up early and start the whole dressing process and be on faire site by 9am. Here is a video for your enjoyment!
Wednesday, October 17, 2012
Dreadlocks and a Spider, OH MY!
In my last entry I had mentioned that there were some dancers in my group who wanted me to do a tutorial on how to do dread falls. These are mainly used for bellydancing, Halloween and cosplay. For people who may not have heard of what a dread fall is, it is natural hair, synthetic hair, or yarn styled to look like dreadlocks that are placed in the hair to create a unique look. I have been asked by my dance instructor to do a workshop and I will be doing one at some point in the near future. We both decided it would be best to do one at a local Hafla event that would feature mini workshops. So if you are in the Central Valley area of California, keep an ear out for when this Hafla event will take place. It may not be until some time next year, but I will be posting about it as soon as it’s planned and finalized.
When you go looking through pictures of bellydancers online, most photos you find of dancers with dreadlocks are actually dancers who have dread falls placed in their hair to give them the look of having real dreadlocks. You will rarely find a dancer with real dreadlocks as there is a process one has to follow in using their real hair, not to mention the maintenance involved. Secondly, bellydancing does allow the option of doing something different with your hair and look for each performance. Which if you have dreadlocks, this does narrow down the options of hair styles you can achieve. A lot of the time, dancers will use different colors of these falls to create an unusual look and cover their natural hair color with decorative flowers, headbands and scarves. These decorations add an exotic look and create a more alluring image aside from hiding any natural hair that is exposed. It would be odd to have your natural hair color exposed when using a color of natural/synthetic hair that is different from your own. If you do not wish to go through the trouble of covering all of your natural hair with all these decorations, you also have the option of matching the color of your fall to the color of your hair so you can only wear a few decorated pieces to hide where the hair is attached.
In making these falls, it’s best to do research and understand what materials would work best to achieve the look and texture you want, not to mention what materials will be easier to work with. For me, it is best if natural hair or synthetic hair is used as opposed to yarn, especially if you want the fall to look real. I will not be covering how to do yarn falls in this tutorial as there are plenty of instructions out there. Not so much for hair. I had to pretty much do a nonstop search for natural or synthetic hair falls for about 3 weeks before I came across one video on one way these falls can be made. So after seeing how difficult it was to find simple instructions on making the falls, I decided to share one way in how to make them.
Once you understand the basics of making these dread falls, you can begin to style them in creative ways to make each piece unique. You may even come up with a more easier way to create these that you may want to share with others who are looking to make their own hair pieces without paying so much for them. Currently, the price range of these dread falls is anywhere from $50- $180 on average. Making your own will only cost you $10-15 dollars at the most and a few hours of work.
The time invested in making one piece will vary depending on how much hair you will use and if you are adding beads or ribbons. As you become more practiced and fall into a rhythm, the process speeds up. For now, when you first start it would be a good idea to expect this to take a few hours without adding any decorations to the dreadlocks.
Items needed:
1 Hair rubberband (A ribbon or elastic band can be used instead)
1 package of natural or synthetic hair
Spray bottle
Rat tail comb
Flat iron
Hand/Dish Towel (Optional)
Clear Nail Polish (Optional)
Steps:
1) Take the package of hair and feed half of it through the rubberband. When you do this, be sure to have the rubberband centered in the middle of the hair.
2) Take a chunk of hair and braid the hair about an inch so that the rubberband is secured in this chunk that will be come your first dreadlock strand.
3) Once you have made a braid about an inch long, take the rat tail comb and start teasing the hair just below the braid. You will be teasing the hair in an upward motion towards the braid on all sides of the chunk of hair for the full length of hair. You will want to get this knotted so you can keep the braid in place.
4) When you are done teasing, start twisting the hair from top to bottom. While you are doing this, tuck some of the “rough” areas into the twist so you have as even of a twist as possible.
5) At this time, you can go about this next step in 2 ways:
You can spray the hair with water until it is damp, cover the hair with the towel and apply the flat iron along the towel where it is covering the hair. This helps protect some flat iron surfaces depending on the model you have and/or it helps protect the natural/synthetic hair if you want to prevent burning/melting the hair.
The other way is to spray the hair with water and directly apply the flat iron without the towel. Only do step if you don’t care about the flat iron you are using or the model you are using has a wet to dry feature. I apply the flat iron directly to the hair as my flat iron has a wet to dry feature.
You will hold the flat iron in place for about 10-30 seconds depending on if you covered the hair with a towel or not. You will do this the entire way down the length of hair. If you accidentally melt some places of the dread (if you are using synthetic hair), don’t worry about it as you can’t tell from far away and it will help hold the hair so it won’t come undone.
6) When you come to the end, you can do 2 things to make sure the ends of the hair do not unravel. If you are using synthetic hair, you can melt the ends with the flat iron. If you have issues melting the ends, you can use the clear nail polish on the tips. You can also use the nail polish on the ends of the natural hair as well if the heat from the flat iron doesn’t keep the hair styled.
** Please note that you will have to do occasional touch ups on the ends, but for
the most part, the hair stays very well.
You will repeat the above steps for each dreadlock strand you work on until all of the hair is secured and styled on the rubberband. If you choose to use a ribbon or an elastic band instead of a rubberband, these will allow you to tie the dread falls to your hair. The only down side is that it makes it a little more difficult to work with the hair and making sure it stays on either the ribbon or elastic band. You’ll have open ends and if the falls slip off, you’ll have to work to get them back on, not to mention, you will also have the ends to hide once the fall is tied on. But you’ll need to go with what will work best for you.
Later on, after you get the hang of making dread falls, you can add beads to a few dread strands to dress up the piece or you can use ribbons to wrap and braid around a few strands as well (great look for renaissance faires, especially if you use leather straps/thongs).
I do plan on making a video tutorial at some point to post on this blog so you can see each step of the process and to show some of the dread falls that I had already made as examples. I just need to make sure I have enough space and a good setup so you can see what I am doing without obstruction of view.
And now for a Halloween treat. I've had the pleasure of seeing this awesome dancer at festival in Bakersfield CA for a bellydance festival. This dance has been requested by many and I wish to share it with you. Please enjoy Marjahni's Itsy Bitsy Spider!
When you go looking through pictures of bellydancers online, most photos you find of dancers with dreadlocks are actually dancers who have dread falls placed in their hair to give them the look of having real dreadlocks. You will rarely find a dancer with real dreadlocks as there is a process one has to follow in using their real hair, not to mention the maintenance involved. Secondly, bellydancing does allow the option of doing something different with your hair and look for each performance. Which if you have dreadlocks, this does narrow down the options of hair styles you can achieve. A lot of the time, dancers will use different colors of these falls to create an unusual look and cover their natural hair color with decorative flowers, headbands and scarves. These decorations add an exotic look and create a more alluring image aside from hiding any natural hair that is exposed. It would be odd to have your natural hair color exposed when using a color of natural/synthetic hair that is different from your own. If you do not wish to go through the trouble of covering all of your natural hair with all these decorations, you also have the option of matching the color of your fall to the color of your hair so you can only wear a few decorated pieces to hide where the hair is attached.
In making these falls, it’s best to do research and understand what materials would work best to achieve the look and texture you want, not to mention what materials will be easier to work with. For me, it is best if natural hair or synthetic hair is used as opposed to yarn, especially if you want the fall to look real. I will not be covering how to do yarn falls in this tutorial as there are plenty of instructions out there. Not so much for hair. I had to pretty much do a nonstop search for natural or synthetic hair falls for about 3 weeks before I came across one video on one way these falls can be made. So after seeing how difficult it was to find simple instructions on making the falls, I decided to share one way in how to make them.
Once you understand the basics of making these dread falls, you can begin to style them in creative ways to make each piece unique. You may even come up with a more easier way to create these that you may want to share with others who are looking to make their own hair pieces without paying so much for them. Currently, the price range of these dread falls is anywhere from $50- $180 on average. Making your own will only cost you $10-15 dollars at the most and a few hours of work.
The time invested in making one piece will vary depending on how much hair you will use and if you are adding beads or ribbons. As you become more practiced and fall into a rhythm, the process speeds up. For now, when you first start it would be a good idea to expect this to take a few hours without adding any decorations to the dreadlocks.
Items needed:
1 Hair rubberband (A ribbon or elastic band can be used instead)
1 package of natural or synthetic hair
Spray bottle
Rat tail comb
Flat iron
Hand/Dish Towel (Optional)
Clear Nail Polish (Optional)
Steps:
1) Take the package of hair and feed half of it through the rubberband. When you do this, be sure to have the rubberband centered in the middle of the hair.
2) Take a chunk of hair and braid the hair about an inch so that the rubberband is secured in this chunk that will be come your first dreadlock strand.
3) Once you have made a braid about an inch long, take the rat tail comb and start teasing the hair just below the braid. You will be teasing the hair in an upward motion towards the braid on all sides of the chunk of hair for the full length of hair. You will want to get this knotted so you can keep the braid in place.
4) When you are done teasing, start twisting the hair from top to bottom. While you are doing this, tuck some of the “rough” areas into the twist so you have as even of a twist as possible.
5) At this time, you can go about this next step in 2 ways:
You can spray the hair with water until it is damp, cover the hair with the towel and apply the flat iron along the towel where it is covering the hair. This helps protect some flat iron surfaces depending on the model you have and/or it helps protect the natural/synthetic hair if you want to prevent burning/melting the hair.
The other way is to spray the hair with water and directly apply the flat iron without the towel. Only do step if you don’t care about the flat iron you are using or the model you are using has a wet to dry feature. I apply the flat iron directly to the hair as my flat iron has a wet to dry feature.
You will hold the flat iron in place for about 10-30 seconds depending on if you covered the hair with a towel or not. You will do this the entire way down the length of hair. If you accidentally melt some places of the dread (if you are using synthetic hair), don’t worry about it as you can’t tell from far away and it will help hold the hair so it won’t come undone.
6) When you come to the end, you can do 2 things to make sure the ends of the hair do not unravel. If you are using synthetic hair, you can melt the ends with the flat iron. If you have issues melting the ends, you can use the clear nail polish on the tips. You can also use the nail polish on the ends of the natural hair as well if the heat from the flat iron doesn’t keep the hair styled.
** Please note that you will have to do occasional touch ups on the ends, but for
the most part, the hair stays very well.
You will repeat the above steps for each dreadlock strand you work on until all of the hair is secured and styled on the rubberband. If you choose to use a ribbon or an elastic band instead of a rubberband, these will allow you to tie the dread falls to your hair. The only down side is that it makes it a little more difficult to work with the hair and making sure it stays on either the ribbon or elastic band. You’ll have open ends and if the falls slip off, you’ll have to work to get them back on, not to mention, you will also have the ends to hide once the fall is tied on. But you’ll need to go with what will work best for you.
Later on, after you get the hang of making dread falls, you can add beads to a few dread strands to dress up the piece or you can use ribbons to wrap and braid around a few strands as well (great look for renaissance faires, especially if you use leather straps/thongs).
I do plan on making a video tutorial at some point to post on this blog so you can see each step of the process and to show some of the dread falls that I had already made as examples. I just need to make sure I have enough space and a good setup so you can see what I am doing without obstruction of view.
And now for a Halloween treat. I've had the pleasure of seeing this awesome dancer at festival in Bakersfield CA for a bellydance festival. This dance has been requested by many and I wish to share it with you. Please enjoy Marjahni's Itsy Bitsy Spider!
Wednesday, October 10, 2012
New Projects, Poor Judgements and Inner Determination
I honestly haven't forgotten this blog. Things have been a little busy with both dancing and life that have my full attention right now. Tribal classes have been going very well and I began learning my first choreography under the new instructor. It's a fun piece and one that I have seen performed by the group I'm with in the past. It's a very slow and graceful piece. It's something I look forward to performing come the formal and nonformal student recitals. Looks like the nonformal recital may be sometime at the beginning of the year where the formal will be some time in the spring. Regardless, I am excited to present my first learned choreography when the time comes.
I've been working on costuming ideas and a new solo choreography that times out to about 6 minutes. It's a fun piece that I hope to perform sometime next year or the year after depending on the venue. The hair falls that I have been working on have been coming along nicely as well. I already have a few people asking me to do a tutorial and/or a mini workshop at a future hafla event, including my instructor. I can't tell you how much that made my day.
This last Sunday some of the local dancers met in Hanford to do a drum circle where the renaissance faire was to be held this last weekend. It was cancelled due to a vendor issue along with financial reasons. So about 12 of us showed to drum while a few danced. It was a lot of fun and we had a few groups of people hang out near us to enjoy the circle while other groups came and went. Overall it was a fun day and I was thanked for orchestrating the event. I never really thought of myself being in charge. I mainly thought it was a cool idea to get together and drum. So to have people thank me afterward for organizing the event caught me off guard and touched me. It was a wonderful feeling and a great experience.
I've also begun prepping for the Kearney Renaissance Faire that will be taking place November 10-11th. Currently, renaissance faires are the only performances that I can participate in until my knowledge of the tribal style is firmly under by belt. I'm actually happy with that arrangement as it will allow me time to learn the style thoroughly before being expected to perform at the yearly Rogue show in town as well as other events throughout the year that will get my drumming and zill skills honed. The only few events I would be expected to perform at would be for renaissance faires for the improv dancing and drumming, not to mention the formal and nonformal student recitals that were brought up earlier.
I've been spending the last few weeks reflecting how I got to where I am. Some of it was help from unknown forces, some of it was strength to do what needed to be done from past experiences, and some was inspired by someone who urged me to go above and beyond. I'm hearing every now and then that I am being brought up in conversation, and most of the time it is in a negative way. Am I hurt by this? Not at all, just a little disappointed that people are being childish in their ways, but it's actually flattering as it shows that people have no life and they feel they have to talk about someone who is no longer in the picture. Rumors are starting to go around about the situation that happened 4 months ago and the more they spread the more they become further from the truth. I've had people come up to me who don't know about this blog to ask me what happened. They ask because they don't believe the rumors and because they have gotten to know who I am. They know that I am not the kind of person to take attention away from others or be out for myself. I do what is best for me just like everyone else does when situations arise that make things difficult. I told these people the truth without dropping names or going into detail because they really don't need to know all my reasons or thoughts on matters. I was unhappy with things and I had hit a point where I wanted to learn something new under the advice I was given by a friend who meant a lot to me prior to their passing. I left under my own decision. It's true that I have been banned from ever returning to the previous group I was with, but that ban came a month after I decided to leave. The only thing that had changed after I made the decision was that someone just came to lock the door after I had left. But I am not sad about that. It's not something I wanted to see happen, but I'm not sad.
I now have new opportunities opening up to me that were not really available before. I found several people who wish to promote a healthy bellydance community and they encourage students to attend workshops and additional classes without anyone taking offense or allowing hate to be generated because someone wanted to be more involved in things. I've had a few of my ideas tossed around on some creative possibilities by others and asked to post tutorials on some costuming and hair falls. My ideas on things matter with the people I am now with and it's a great feeling to feel wanted and welcomed. I partially regret that things happened the way that they did because no one did the adult thing and approached me once my blog was found, but that is on those people, not me. I don't regret it because this blog is about me and my decisions on how to handle this part of my life, including my experience that someone may learn something from for their own reference guide. Students will always come and go, but it's no ones place to judge someone for wanting to expand their skills and get away from something that doesn't feel right anymore or stay around the negativity that was brewing under the surface. Bottom line is, I am much happier where I am now because I feel like I belong.
One thing that some people will never accept, based on their own assumptions, is that I am not out to undermine anyone. People undermine themselves without any help from others and I only step back and allow them to do so without being brought down with them. Only the insecure will attack those who are confident in themselves. I don't care what plans are being made for shows in a group that I am no longer a part of. It doesn't concern me nor do I care to know. If something slips, I don't pass it along. I never shared info when things did pop out into the open when I was with the previous group if I overheard or saw something, so why would that change now?
For those who are from that group that are spreading lies and reading this, you should know that your ugly side is showing and people are noticing. I have never shoved anyone out of the way during a performance or rehearsal to be front and center on stage. I thought this would be clear by the fact that I was never quick to take the front stage. I was placed there most of the time by the instructor, not because I felt I deserved to be there. I have never pressured anyone to do anything against their will. I have advised people to bring up their concerns to the person it involved because of the continued complaints, but I never pushed anyone to do so. I do not seek to undermine a student or instructor (past or present), never have and never will. I don't think I am better than anyone else and I do not claim to be other than stating that I do take responsibility for my short comings and do what I can to improve those mistakes without blaming others for something that I was fully responsible of, especially when it's something that is brought to my attention that I was at fault for. There are very few people in that dance group who really know me and I can guarantee that no one in the class that I was in is considered part of the few. I kept to myself most of the time so no one really knows me in that class.
So a warning to those who are spreading rumors or lies about me, people who have gotten to know me already know you are lying as your lies conflict with what people already understand about me. You are only shooting yourself in the foot because when the time comes for you to try another group, those people would be less likely to trust you because you have placed yourself in the middle of something that you never belonged in regarding my decision.
My advice to you is mind your own business and pull your nose out of what I had decided or what I am currently doing. It's not your place to judge nor does my decision to leave affect/concern you in any way save for having one less person in your group. Focus on yourself for once and work on your flaws instead of focusing on someone who is no longer around. If you honestly have a problem with me, then approach me to discuss whatever problem you have. But understand that you are being a coward by not coming up to me to deal with your issue and choose to try to make matters worse by trying to turn people against me by fabricating something that never happened or a matter that doesn't concern them. I don't need to explain myself to anyone and the only person I answer to is me. So get off your high horse and leave me out of your conversations because you don't have anything better to do.
With that being said, I hope those who are in a similar situation that I am in understands that you have a right to do what is best for you regardless of what others my think or feel. You only answer to yourself and you don't need to be brought down by people who feel threatened by you or want to bring you down to make themselves feel like they are worth more than they are. You are the only person who is pushing yourself to continue learning a beautiful art. You are the one who makes the decision on where you want to go and when it's time to try something knew. If you are in an atmosphere that isn't agreeing with your personal growth, go someplace else that you feel you will flourish without feeling guilty about it. You are learning bellydancing for you and you alone. You are not there to impress anyone. You are there to encourage something you have inside of you that shouldn't be dampened by anything or anyone. Embrace your strength and pity those who only know how to stir up drama because they are the ones who are missing out on something that inspires someone to be more than what they are. You are there to learn for your benefit, not someone else's.
I've been working on costuming ideas and a new solo choreography that times out to about 6 minutes. It's a fun piece that I hope to perform sometime next year or the year after depending on the venue. The hair falls that I have been working on have been coming along nicely as well. I already have a few people asking me to do a tutorial and/or a mini workshop at a future hafla event, including my instructor. I can't tell you how much that made my day.
This last Sunday some of the local dancers met in Hanford to do a drum circle where the renaissance faire was to be held this last weekend. It was cancelled due to a vendor issue along with financial reasons. So about 12 of us showed to drum while a few danced. It was a lot of fun and we had a few groups of people hang out near us to enjoy the circle while other groups came and went. Overall it was a fun day and I was thanked for orchestrating the event. I never really thought of myself being in charge. I mainly thought it was a cool idea to get together and drum. So to have people thank me afterward for organizing the event caught me off guard and touched me. It was a wonderful feeling and a great experience.
I've also begun prepping for the Kearney Renaissance Faire that will be taking place November 10-11th. Currently, renaissance faires are the only performances that I can participate in until my knowledge of the tribal style is firmly under by belt. I'm actually happy with that arrangement as it will allow me time to learn the style thoroughly before being expected to perform at the yearly Rogue show in town as well as other events throughout the year that will get my drumming and zill skills honed. The only few events I would be expected to perform at would be for renaissance faires for the improv dancing and drumming, not to mention the formal and nonformal student recitals that were brought up earlier.
I've been spending the last few weeks reflecting how I got to where I am. Some of it was help from unknown forces, some of it was strength to do what needed to be done from past experiences, and some was inspired by someone who urged me to go above and beyond. I'm hearing every now and then that I am being brought up in conversation, and most of the time it is in a negative way. Am I hurt by this? Not at all, just a little disappointed that people are being childish in their ways, but it's actually flattering as it shows that people have no life and they feel they have to talk about someone who is no longer in the picture. Rumors are starting to go around about the situation that happened 4 months ago and the more they spread the more they become further from the truth. I've had people come up to me who don't know about this blog to ask me what happened. They ask because they don't believe the rumors and because they have gotten to know who I am. They know that I am not the kind of person to take attention away from others or be out for myself. I do what is best for me just like everyone else does when situations arise that make things difficult. I told these people the truth without dropping names or going into detail because they really don't need to know all my reasons or thoughts on matters. I was unhappy with things and I had hit a point where I wanted to learn something new under the advice I was given by a friend who meant a lot to me prior to their passing. I left under my own decision. It's true that I have been banned from ever returning to the previous group I was with, but that ban came a month after I decided to leave. The only thing that had changed after I made the decision was that someone just came to lock the door after I had left. But I am not sad about that. It's not something I wanted to see happen, but I'm not sad.
I now have new opportunities opening up to me that were not really available before. I found several people who wish to promote a healthy bellydance community and they encourage students to attend workshops and additional classes without anyone taking offense or allowing hate to be generated because someone wanted to be more involved in things. I've had a few of my ideas tossed around on some creative possibilities by others and asked to post tutorials on some costuming and hair falls. My ideas on things matter with the people I am now with and it's a great feeling to feel wanted and welcomed. I partially regret that things happened the way that they did because no one did the adult thing and approached me once my blog was found, but that is on those people, not me. I don't regret it because this blog is about me and my decisions on how to handle this part of my life, including my experience that someone may learn something from for their own reference guide. Students will always come and go, but it's no ones place to judge someone for wanting to expand their skills and get away from something that doesn't feel right anymore or stay around the negativity that was brewing under the surface. Bottom line is, I am much happier where I am now because I feel like I belong.
One thing that some people will never accept, based on their own assumptions, is that I am not out to undermine anyone. People undermine themselves without any help from others and I only step back and allow them to do so without being brought down with them. Only the insecure will attack those who are confident in themselves. I don't care what plans are being made for shows in a group that I am no longer a part of. It doesn't concern me nor do I care to know. If something slips, I don't pass it along. I never shared info when things did pop out into the open when I was with the previous group if I overheard or saw something, so why would that change now?
For those who are from that group that are spreading lies and reading this, you should know that your ugly side is showing and people are noticing. I have never shoved anyone out of the way during a performance or rehearsal to be front and center on stage. I thought this would be clear by the fact that I was never quick to take the front stage. I was placed there most of the time by the instructor, not because I felt I deserved to be there. I have never pressured anyone to do anything against their will. I have advised people to bring up their concerns to the person it involved because of the continued complaints, but I never pushed anyone to do so. I do not seek to undermine a student or instructor (past or present), never have and never will. I don't think I am better than anyone else and I do not claim to be other than stating that I do take responsibility for my short comings and do what I can to improve those mistakes without blaming others for something that I was fully responsible of, especially when it's something that is brought to my attention that I was at fault for. There are very few people in that dance group who really know me and I can guarantee that no one in the class that I was in is considered part of the few. I kept to myself most of the time so no one really knows me in that class.
So a warning to those who are spreading rumors or lies about me, people who have gotten to know me already know you are lying as your lies conflict with what people already understand about me. You are only shooting yourself in the foot because when the time comes for you to try another group, those people would be less likely to trust you because you have placed yourself in the middle of something that you never belonged in regarding my decision.
My advice to you is mind your own business and pull your nose out of what I had decided or what I am currently doing. It's not your place to judge nor does my decision to leave affect/concern you in any way save for having one less person in your group. Focus on yourself for once and work on your flaws instead of focusing on someone who is no longer around. If you honestly have a problem with me, then approach me to discuss whatever problem you have. But understand that you are being a coward by not coming up to me to deal with your issue and choose to try to make matters worse by trying to turn people against me by fabricating something that never happened or a matter that doesn't concern them. I don't need to explain myself to anyone and the only person I answer to is me. So get off your high horse and leave me out of your conversations because you don't have anything better to do.
With that being said, I hope those who are in a similar situation that I am in understands that you have a right to do what is best for you regardless of what others my think or feel. You only answer to yourself and you don't need to be brought down by people who feel threatened by you or want to bring you down to make themselves feel like they are worth more than they are. You are the only person who is pushing yourself to continue learning a beautiful art. You are the one who makes the decision on where you want to go and when it's time to try something knew. If you are in an atmosphere that isn't agreeing with your personal growth, go someplace else that you feel you will flourish without feeling guilty about it. You are learning bellydancing for you and you alone. You are not there to impress anyone. You are there to encourage something you have inside of you that shouldn't be dampened by anything or anyone. Embrace your strength and pity those who only know how to stir up drama because they are the ones who are missing out on something that inspires someone to be more than what they are. You are there to learn for your benefit, not someone else's.
Sunday, August 19, 2012
Bellydancing with Swords: Beginner's Tips n Tricks
A week and a half ago I had the pleasure of playing with a sword for the first time since I started bellydancing 3 years ago. It was a nice little surprise that my instructor sprung on us for our last day in the summer workshop classes. As I did not own my own sword, my instructor brought 2 to loan out and I was lucky enough to get one. I was surprised to find that balancing a sword was not all that difficult as far as keeping it on your head once you found the balance point. What I did find difficult was trying to adjust to the weight of the sword as well as feeling the indentation take place on my head where the sword was sitting as I began to move with it. Both of these factors will develop and improve over time with practice. The weight of the sword you will adjust to while the indentation in your head will also become more permanent as you balance and play with the sword more.
One little trick I had noticed with my instructor's sword was that she had roughed up the area that rests on the head in order for her to know she has the sword placed where it's balance point is. I had never stopped to think that this would be a trick used. I knew that as time goes on, dancers become very aware and familiar with their swords to automatically know where on the sword the head needs to be touching to make sure the balance is as solid as it can be. For first starting out, this is a good trick to use for practices (not performances) until you become more familiar with the sword.
Since this last week has been a break between the summer workshops and the beginning of the fall semester of classes, I decided to look into sword play a little more. I recognize that being a Level 2B student I will not play with swords until I become a Level 3 student, but it would not hurt to know some things about the sword so that I am better prepared next time when I have the chance to play with one or I am able to purchase my own to play with until I graduate into the next level. So here are some little tidbits I would like to share, along with the sources listed so that if you would like to look more into what the author has to say about different aspects of bellydancing, you are able to access those.
One dancer who is a great resource for tips and tricks to sword play is Shira. Below here is what she has to offer in ways of the sword:
Tips & Tricks for Belly Dancing With a Sword by Shira
Here is another bellydancer who has some great information as well on sword play:
Choosing and Dancing with a Belly Dance Sword by Zarifa, edited by W. Snowman
Balancing a belly dance sword is a beautiful addition to your dancing routine, but more importantly it is an exercise in one of the most important skills in belly dancing, isolation. A skilled belly dancer can restrict dancing movements to one part of her body while keeping others perfectly motionless, or moving in a different direction. Dancing with a sword is an excellent exercise to perfect this skill.
How do I dance with a sword balanced on my head? Perfect isolation can take many hours of training and can be quite daunting with a heavy sword - and painful when dropped! You may want to practice with something lighter at first - a book, block of wood, or broom handle. Remember isolation is the key.
Begin with simple shimmies: shimmy the hips while keeping your upper body and your head perfectly still. Then practice shoulder shimmies while keeping your neck and head motionless. Once you can perform shimmies without dropping your "practice sword," move on to movements requiring more control to keep your head stationary, such as camel or body waves. The downward figure eight and elevations (lift up on your toes then flat foot) while doing shimmies are not only challenging but look great while keeping a sword balanced on your head.
Once you can perform a few moves without dropping your book or broom handle (most of the time!) you can try dancing with a real sword. Most belly dancing swords have a fairly heavy handle so that the balance point is a closer to the handle. Move it around until you find the spot where it can sway a little without sliding off your head. A good balanced sword should lay on the edge with the blade perpendicular and the handle up straight and ready, easy to reach when you need it.
Some dancers find it much easier to perform sword work while wearing a turban or other head wear. This is not really "cheating" unless you use a really thick head wear or alter it to hold the sword. Some dancers have thick hair, making it easier to pick up belly dance sword work, some need a little "help."
Once you feel comfortable with isolated movements, it's time to try spins with the sword on your head. The trick is to use a dance move that puts your arms over your head so that one arm rests against the sword while you begin the spin. As the sword begins to spin with you as one, you may be able to release the sword and hold it in a perfect spin with your head and drop your arms. (Or maybe not!) You will need to move your arms back up and brace the sword as you come out of the spin so that it doesn't keep spinning and fly off your head. Don't be discouraged if this doesn't come to you easily, very few dancers can perform this move gracefully and only after years of diligent practice. When you become comfortable with controlling the sword as you move, you can begin keeping your arms further and further from actually touching the sword as you turn. A dancer experienced in sword work can make several complex changes without ever touching the sword.
How do I choose my belly dancing sword? Choose a curved blade sword or scimitar with a smooth blade and without an edge; the edge should be flat. Avoid swords with large "handguards" on the handle, such as fencing-style swords with handguards off to the side, as these will throw the balance off. Many misunderstand "balanced" to mean that the sword should balance in the middle of the blade. The balance of a belly dance sword refers to how straight it stands on edge and can be seen by the angle of the blade to the floor when balanced on its center of gravity.
Because the handle is heavier than the blade, the center of lengthwise balance of a belly dance sword usually closer to the handle than the middle of the blade. When balanced on your head, a well balanced sword should lay on the inner curved edge with the blade perfectly perpendicular to the floor. The blade should not be leaning toward the front or back. Sometimes a sword that is out of balance and leans to the front or back can be re-balanced by twisting the handle.
Do not use a battle sword for belly dancing. They are not balanced correctly and having an edge will be extremely difficult to dance with. Some swords are heavier than others and it will take some conditioning to get used to the weight. Dance until your scalp goes numb, then practice other moves!
Can I dance with more than one sword? Believe it or not, an experienced dancer can balance two swords on her head, or one on the head and another on the hip. Another fun routine is to move into a back bend with the swords touching the floor, or one on the head with the other on the stomach while doing floor work. Some even wear a blindfold while dancing with the swords on a basket balanced on their head. All of these moves require practice with a teacher who can help you.
Safety first! There are several things that can go wrong while practicing belly dance sword work, so please be careful. Although belly dancing swords don't have a point or an edge, they are still heavy and can cause serious damage or injury. Make sure your handle is solidly attached and not coming loose; swinging the sword around fast can cause the blade to come loose and fly out. Be sure to give yourself plenty of room when practicing. Belly dancing with a sword in close quarters or areas with breakables can be costly.
There are several more resources out there to learn how to choose a sword best for you, how to conquer sword play and wardrobe issues, techniques to be used in order to become very familiar with your sword, and how to make your performance with a sword shine. I finally want to give you some videos to watch from people who give some excellent demonstrations on the sword. There are several videos out there on sword play, but I just wanted to give you a few to get started with. I hope you have enjoyed this blog entry and enjoy the following videos on sword play along with a mesmerizing sword performance by Irina Akulenko.
Sahira's Sword Instruction
Shoulder Exercises for Sword by Mahin
Turning with Sword by Mahin
Strengthening the Wrists for Sword Handling by Mahin
Irina Akulenko - "Justice" from "Tarot - Fantasy Bellydance" DVD
One little trick I had noticed with my instructor's sword was that she had roughed up the area that rests on the head in order for her to know she has the sword placed where it's balance point is. I had never stopped to think that this would be a trick used. I knew that as time goes on, dancers become very aware and familiar with their swords to automatically know where on the sword the head needs to be touching to make sure the balance is as solid as it can be. For first starting out, this is a good trick to use for practices (not performances) until you become more familiar with the sword.
Since this last week has been a break between the summer workshops and the beginning of the fall semester of classes, I decided to look into sword play a little more. I recognize that being a Level 2B student I will not play with swords until I become a Level 3 student, but it would not hurt to know some things about the sword so that I am better prepared next time when I have the chance to play with one or I am able to purchase my own to play with until I graduate into the next level. So here are some little tidbits I would like to share, along with the sources listed so that if you would like to look more into what the author has to say about different aspects of bellydancing, you are able to access those.
One dancer who is a great resource for tips and tricks to sword play is Shira. Below here is what she has to offer in ways of the sword:
Tips & Tricks for Belly Dancing With a Sword by Shira
Here is another bellydancer who has some great information as well on sword play:
Choosing and Dancing with a Belly Dance Sword by Zarifa, edited by W. Snowman
Balancing a belly dance sword is a beautiful addition to your dancing routine, but more importantly it is an exercise in one of the most important skills in belly dancing, isolation. A skilled belly dancer can restrict dancing movements to one part of her body while keeping others perfectly motionless, or moving in a different direction. Dancing with a sword is an excellent exercise to perfect this skill.
How do I dance with a sword balanced on my head? Perfect isolation can take many hours of training and can be quite daunting with a heavy sword - and painful when dropped! You may want to practice with something lighter at first - a book, block of wood, or broom handle. Remember isolation is the key.
Begin with simple shimmies: shimmy the hips while keeping your upper body and your head perfectly still. Then practice shoulder shimmies while keeping your neck and head motionless. Once you can perform shimmies without dropping your "practice sword," move on to movements requiring more control to keep your head stationary, such as camel or body waves. The downward figure eight and elevations (lift up on your toes then flat foot) while doing shimmies are not only challenging but look great while keeping a sword balanced on your head.
Once you can perform a few moves without dropping your book or broom handle (most of the time!) you can try dancing with a real sword. Most belly dancing swords have a fairly heavy handle so that the balance point is a closer to the handle. Move it around until you find the spot where it can sway a little without sliding off your head. A good balanced sword should lay on the edge with the blade perpendicular and the handle up straight and ready, easy to reach when you need it.
Some dancers find it much easier to perform sword work while wearing a turban or other head wear. This is not really "cheating" unless you use a really thick head wear or alter it to hold the sword. Some dancers have thick hair, making it easier to pick up belly dance sword work, some need a little "help."
Once you feel comfortable with isolated movements, it's time to try spins with the sword on your head. The trick is to use a dance move that puts your arms over your head so that one arm rests against the sword while you begin the spin. As the sword begins to spin with you as one, you may be able to release the sword and hold it in a perfect spin with your head and drop your arms. (Or maybe not!) You will need to move your arms back up and brace the sword as you come out of the spin so that it doesn't keep spinning and fly off your head. Don't be discouraged if this doesn't come to you easily, very few dancers can perform this move gracefully and only after years of diligent practice. When you become comfortable with controlling the sword as you move, you can begin keeping your arms further and further from actually touching the sword as you turn. A dancer experienced in sword work can make several complex changes without ever touching the sword.
How do I choose my belly dancing sword? Choose a curved blade sword or scimitar with a smooth blade and without an edge; the edge should be flat. Avoid swords with large "handguards" on the handle, such as fencing-style swords with handguards off to the side, as these will throw the balance off. Many misunderstand "balanced" to mean that the sword should balance in the middle of the blade. The balance of a belly dance sword refers to how straight it stands on edge and can be seen by the angle of the blade to the floor when balanced on its center of gravity.
Because the handle is heavier than the blade, the center of lengthwise balance of a belly dance sword usually closer to the handle than the middle of the blade. When balanced on your head, a well balanced sword should lay on the inner curved edge with the blade perfectly perpendicular to the floor. The blade should not be leaning toward the front or back. Sometimes a sword that is out of balance and leans to the front or back can be re-balanced by twisting the handle.
Do not use a battle sword for belly dancing. They are not balanced correctly and having an edge will be extremely difficult to dance with. Some swords are heavier than others and it will take some conditioning to get used to the weight. Dance until your scalp goes numb, then practice other moves!
Can I dance with more than one sword? Believe it or not, an experienced dancer can balance two swords on her head, or one on the head and another on the hip. Another fun routine is to move into a back bend with the swords touching the floor, or one on the head with the other on the stomach while doing floor work. Some even wear a blindfold while dancing with the swords on a basket balanced on their head. All of these moves require practice with a teacher who can help you.
Safety first! There are several things that can go wrong while practicing belly dance sword work, so please be careful. Although belly dancing swords don't have a point or an edge, they are still heavy and can cause serious damage or injury. Make sure your handle is solidly attached and not coming loose; swinging the sword around fast can cause the blade to come loose and fly out. Be sure to give yourself plenty of room when practicing. Belly dancing with a sword in close quarters or areas with breakables can be costly.
There are several more resources out there to learn how to choose a sword best for you, how to conquer sword play and wardrobe issues, techniques to be used in order to become very familiar with your sword, and how to make your performance with a sword shine. I finally want to give you some videos to watch from people who give some excellent demonstrations on the sword. There are several videos out there on sword play, but I just wanted to give you a few to get started with. I hope you have enjoyed this blog entry and enjoy the following videos on sword play along with a mesmerizing sword performance by Irina Akulenko.
Sahira's Sword Instruction
Shoulder Exercises for Sword by Mahin
Turning with Sword by Mahin
Strengthening the Wrists for Sword Handling by Mahin
Irina Akulenko - "Justice" from "Tarot - Fantasy Bellydance" DVD
Thursday, July 26, 2012
Hair Raising Challenges
Lately I have been feeling a little run down. A lot has to deal with some personal life issues going on and grief I am still dealing with, but all I can do is keep doing something to stay distracted right? At least that is what I am trying to do and I have found something new that has sparked a little bit of that creative streak in me that may help. I started doing some research on hair falls because I do not have the money at the present time to purchase any from well known vendors/makers as they tend to be on the expensive side depending on what you want. Part of this research has stemmed from the realization that my hair piece I have used the last 2-3 years needs a break. Despite being as careful as I can with brushing it to get knots out from performances, it is difficult to be as gentle as possible when you see several strands being pulled free with each brush stroke you make. Not to mention that the curl is becoming a little more difficult to keep in the hair itself as it continues to be used. Now granted, I do not perform on a consistent basis, but I have performed enough with the hair piece that it is now showing signs of use. It’s not balding! But just the fact that it’s losing its curl after several settings and the consistent loss of strands, I think it’s time it needs a break. So I had made the decision to find a few more alternatives for hair pieces to alternate between so one piece is not getting more use than another. It’s never a good idea to stick to just one piece as having a variety to play with makes dressing up for performances more fun. Plus, this allows each hair piece to have a longer life before I have to spend money on something shiny and new.
So back to the research on hair falls! After looking at several how-to sites, many of which were based more on yarn falls than hair, I have finally come across a small handful of sources that show the different techniques used to create these wonderful looks depending on what you are wanting to achieve with your costume. One source stated using synthetic hair achieved a natural look when styled properly and, in some cases, was better to use due to the difference in purchase price when compared to the natural hair. Taking this into consideration, I began looking at local beauty supply shops to see how much they were asking for packages of synthetic hair compared to natural hair. To my surprise, the price was cheap and staggering when comparing the prices! There was a $20-40 difference depending on length. At this point I couldn’t help myself and I really wanted to try my hand at creating something for myself to see if this would be a possible future investment with creating my own items. So I went to one beauty supply shop and purchased 2 packages of synthetic hair to play with this last weekend. After 2-3 hours of work and styling, I created dread falls that turned out marvelously! They are plain and have no beads or accessories attached to add some appeal, but they still turned out wonderful. Looking at them today, the dreads are still holding!
Now that I am excited that a first attempt turned out better than what I had expected, I have decided to start making a few looks for myself and, at a later date, start offering the sale of dread falls based on what people would like when I have had enough practice. For your curiosity, I have a few pictures below of what the fall looks like.
In addition to the creation of my own hair pieces, I have met some challenges in the new classes I have been attending for tribal dancing. As a quick reminder, my learning of tribal is not the ATS (American Tribal Style) Bellydancing nor is it the modern Tribal Fusion Bellydancing that you see from dancers such as Kami Liddle, Zoe Jakes, Ava Fleming, Sharon Kihara, Mardi Love, Maya , Tjarda, Urban Tribal, Sabrina, and Rachel Brice just to name a few. I’m learning a tribal style that is between the two. It’s still Tribal Fusion, but not as difficult regarding the isolations the listed dancers use or teach. One move that has proven challenging is the omi which is a lot of muscle contractions and releases in a specific order regarding the hips and lower abdomen. When I learned this move from a previous instructor, it was taught as a small hip circle so to speak, almost like a gyrating hip movement. I learned that the proper way in doing the move is making sure I release certain muscles while contracting a different muscle next in line to achieve the omi. If I was starting with my right hip, I would contract the oblique muscle to raise the hip followed by releasing that muscle while contracting the lower abdominal muscle. This muscle is then released as the left oblique muscle is contracted. Finally this muscle is released and you are back to where you started where everything is in a relaxed state again before starting the movement over. Another challenge I have is finding my center of balance for turns/spins and making eye contact on a focal point to help ease the severity of dizziness. I’m not accustomed to turns/spins when it is more than just one when compared to multiple turns for a specific number of counts. Turns/spins were never covered in my previous lessons. I think it was reserved for the advanced class, but even recalling those group performances by the advanced class I do not recall multiple turns unless it was for solos. The last 2 classes we have focused on making sure our eyes are on a specific point as we turned to help us travel in the correct direction aside from easing the equilibrium problem. For me, it was more of making sure I didn’t fall over by the second or third turn when I whip my head around to focus my eyes on the point I am suppose to. So I have some work to do to become accustomed to turns without feeling like I am on a Tilt-a-Whirl ride.
This week’s class was kind of a refresher on figure eight movements and mayan movements. There was a lot of emphasis on proper posture during these movements (which, again, I lacked proper education on). Just to touch on it real fast for those who may be uncertain, when bellydancing you always need to be sure that your back is straight, your hips are pulled in so that your tailbone is pointed down a little more than usual and that your knees are bent almost as if you are just starting to sit down in a chair. This is to ensure all of your core muscles have more room to move so that isolations are done easier and more fluid like. It feels awkward, but it makes a difference! Back to the figure eights and mayans, I found that because I never really had the proper posture for these movements that I was constantly wanting to raise my heels for each side of the hip I was lifting. When you are traveling, the lifting of the heel isn’t really important as compared to when you are stationary and doing these moves. My instructor took the time this week to walk around the class and see where students needed help. For me, it was pointed out that I should start practicing with a little wider foot stance because I was feeling resistance when I brought my hip out for the movements. It felt like I wasn’t able to reach far enough like I should. So after given some pointers I’m going to need to work on my oblique muscles so I have more stretch to work with in both sides.
As of today, there are only 2 more classes left before we are done with the summer session workshops. After that, there are a few weeks to relax and then it’s back to the regularly scheduled 3 month semesters starting in September. I’m definitely going to have to work on getting some practice time in when the break hits so I am a little more limber and closer to achieving new and reviewed movements before the new session of classes as these will focus on choreography. Maybe those videos I have yet to go over may need to be brought out. I’m guilty for having some awesome instructional videos at my figure tips but not sitting down and actually working with them. I have a bad habit of stopping what I’m doing and just marvel at the instructor’s fluid movements on the video. Shame on me!
Before I wrap up this entry, here is some good advice from Zabel, located in Maine, who sends out a monthly newsletter and gives some good advice to students who are new to bellydancing that are looking for an instructor to dance with or if you are a veteran looking to further your knowledge:
Studying With a New Belly Dance Instructor
If you are looking to join a new dance studio or add another belly dance class to your weekly schedule with a new teacher, the best thing to do is attend the perspective teachers beginner class. By going to her beginner class you have shown that teacher that you are humble enough to know that even in a beginner class you can learn something new. You also get the opportunity to study how that teacher instructs. You will get a good feel for how well you will fit into the new studio. If you are an advanced dancer or even an intermediate dancer, the beginner technique will be easy for you to pick up on, leaving you time and space to focus on the type of instruction, not just the subject matter.
It is always a good idea to let the teacher know you are dropping into her class so she is not caught off guard by a new face. It is wise to tell the teacher about:
- any previous dance experience you have
- any previous belly dance classes you have taken in the past
- how long you took classes
- how long ago you take the class
- who the instructor was (this is less important if you are transferring from a studio in a different state)
If you could not contact the teacher prior to you dropping in then it is best to quickly introduce yourself to the instructor prior to class starting. Make sure you arrive 15 minutes early to ensure you get a few minutes to talk to the teacher. Let her know you are looking to see what level you would best fit in at the studio, but keep it short and sweet. Wait until after class is over to talk to the teacher in depth about why you are in her beginner class. This way you can insure the teacher can give you her full attention. The beginning of class can be a bit hectic with the teacher taking attendance and checking in with all of her students, getting music set up, and getting the studio set for class. It is not fair to assume she can give you all of her attention before the start of class.
When you are studying the perspective teacher, be aware of
- how she answers questions
- is she a hands on teacher? Or does she stick to the front of the room?
- Are her students participating in class or do they just follow along?
- Does the teacher explain how movements are done in different ways?
- Does she allow questions throughout class or during specific times?
- Is her demeanor appropriate and professional?
- Does she respect students and their learning styles?
The list could go on and on... But these are some of the qualities I look for in my teachers, and I expect my students to be looking for in me.
So back to the research on hair falls! After looking at several how-to sites, many of which were based more on yarn falls than hair, I have finally come across a small handful of sources that show the different techniques used to create these wonderful looks depending on what you are wanting to achieve with your costume. One source stated using synthetic hair achieved a natural look when styled properly and, in some cases, was better to use due to the difference in purchase price when compared to the natural hair. Taking this into consideration, I began looking at local beauty supply shops to see how much they were asking for packages of synthetic hair compared to natural hair. To my surprise, the price was cheap and staggering when comparing the prices! There was a $20-40 difference depending on length. At this point I couldn’t help myself and I really wanted to try my hand at creating something for myself to see if this would be a possible future investment with creating my own items. So I went to one beauty supply shop and purchased 2 packages of synthetic hair to play with this last weekend. After 2-3 hours of work and styling, I created dread falls that turned out marvelously! They are plain and have no beads or accessories attached to add some appeal, but they still turned out wonderful. Looking at them today, the dreads are still holding!
Now that I am excited that a first attempt turned out better than what I had expected, I have decided to start making a few looks for myself and, at a later date, start offering the sale of dread falls based on what people would like when I have had enough practice. For your curiosity, I have a few pictures below of what the fall looks like.
In addition to the creation of my own hair pieces, I have met some challenges in the new classes I have been attending for tribal dancing. As a quick reminder, my learning of tribal is not the ATS (American Tribal Style) Bellydancing nor is it the modern Tribal Fusion Bellydancing that you see from dancers such as Kami Liddle, Zoe Jakes, Ava Fleming, Sharon Kihara, Mardi Love, Maya , Tjarda, Urban Tribal, Sabrina, and Rachel Brice just to name a few. I’m learning a tribal style that is between the two. It’s still Tribal Fusion, but not as difficult regarding the isolations the listed dancers use or teach. One move that has proven challenging is the omi which is a lot of muscle contractions and releases in a specific order regarding the hips and lower abdomen. When I learned this move from a previous instructor, it was taught as a small hip circle so to speak, almost like a gyrating hip movement. I learned that the proper way in doing the move is making sure I release certain muscles while contracting a different muscle next in line to achieve the omi. If I was starting with my right hip, I would contract the oblique muscle to raise the hip followed by releasing that muscle while contracting the lower abdominal muscle. This muscle is then released as the left oblique muscle is contracted. Finally this muscle is released and you are back to where you started where everything is in a relaxed state again before starting the movement over. Another challenge I have is finding my center of balance for turns/spins and making eye contact on a focal point to help ease the severity of dizziness. I’m not accustomed to turns/spins when it is more than just one when compared to multiple turns for a specific number of counts. Turns/spins were never covered in my previous lessons. I think it was reserved for the advanced class, but even recalling those group performances by the advanced class I do not recall multiple turns unless it was for solos. The last 2 classes we have focused on making sure our eyes are on a specific point as we turned to help us travel in the correct direction aside from easing the equilibrium problem. For me, it was more of making sure I didn’t fall over by the second or third turn when I whip my head around to focus my eyes on the point I am suppose to. So I have some work to do to become accustomed to turns without feeling like I am on a Tilt-a-Whirl ride.
This week’s class was kind of a refresher on figure eight movements and mayan movements. There was a lot of emphasis on proper posture during these movements (which, again, I lacked proper education on). Just to touch on it real fast for those who may be uncertain, when bellydancing you always need to be sure that your back is straight, your hips are pulled in so that your tailbone is pointed down a little more than usual and that your knees are bent almost as if you are just starting to sit down in a chair. This is to ensure all of your core muscles have more room to move so that isolations are done easier and more fluid like. It feels awkward, but it makes a difference! Back to the figure eights and mayans, I found that because I never really had the proper posture for these movements that I was constantly wanting to raise my heels for each side of the hip I was lifting. When you are traveling, the lifting of the heel isn’t really important as compared to when you are stationary and doing these moves. My instructor took the time this week to walk around the class and see where students needed help. For me, it was pointed out that I should start practicing with a little wider foot stance because I was feeling resistance when I brought my hip out for the movements. It felt like I wasn’t able to reach far enough like I should. So after given some pointers I’m going to need to work on my oblique muscles so I have more stretch to work with in both sides.
As of today, there are only 2 more classes left before we are done with the summer session workshops. After that, there are a few weeks to relax and then it’s back to the regularly scheduled 3 month semesters starting in September. I’m definitely going to have to work on getting some practice time in when the break hits so I am a little more limber and closer to achieving new and reviewed movements before the new session of classes as these will focus on choreography. Maybe those videos I have yet to go over may need to be brought out. I’m guilty for having some awesome instructional videos at my figure tips but not sitting down and actually working with them. I have a bad habit of stopping what I’m doing and just marvel at the instructor’s fluid movements on the video. Shame on me!
Before I wrap up this entry, here is some good advice from Zabel, located in Maine, who sends out a monthly newsletter and gives some good advice to students who are new to bellydancing that are looking for an instructor to dance with or if you are a veteran looking to further your knowledge:
Studying With a New Belly Dance Instructor
If you are looking to join a new dance studio or add another belly dance class to your weekly schedule with a new teacher, the best thing to do is attend the perspective teachers beginner class. By going to her beginner class you have shown that teacher that you are humble enough to know that even in a beginner class you can learn something new. You also get the opportunity to study how that teacher instructs. You will get a good feel for how well you will fit into the new studio. If you are an advanced dancer or even an intermediate dancer, the beginner technique will be easy for you to pick up on, leaving you time and space to focus on the type of instruction, not just the subject matter.
It is always a good idea to let the teacher know you are dropping into her class so she is not caught off guard by a new face. It is wise to tell the teacher about:
- any previous dance experience you have
- any previous belly dance classes you have taken in the past
- how long you took classes
- how long ago you take the class
- who the instructor was (this is less important if you are transferring from a studio in a different state)
If you could not contact the teacher prior to you dropping in then it is best to quickly introduce yourself to the instructor prior to class starting. Make sure you arrive 15 minutes early to ensure you get a few minutes to talk to the teacher. Let her know you are looking to see what level you would best fit in at the studio, but keep it short and sweet. Wait until after class is over to talk to the teacher in depth about why you are in her beginner class. This way you can insure the teacher can give you her full attention. The beginning of class can be a bit hectic with the teacher taking attendance and checking in with all of her students, getting music set up, and getting the studio set for class. It is not fair to assume she can give you all of her attention before the start of class.
When you are studying the perspective teacher, be aware of
- how she answers questions
- is she a hands on teacher? Or does she stick to the front of the room?
- Are her students participating in class or do they just follow along?
- Does the teacher explain how movements are done in different ways?
- Does she allow questions throughout class or during specific times?
- Is her demeanor appropriate and professional?
- Does she respect students and their learning styles?
The list could go on and on... But these are some of the qualities I look for in my teachers, and I expect my students to be looking for in me.
Sunday, July 1, 2012
Turban Tying
I'm in the process of preparing for a renaissance fair that will be taking place up in Shaver Lake, CA in a few weeks and I thought I would go as a "gypsy" for this fair. I tend to do renaissance fairs when I am able to, whether it's for bellydancing, playing a "gypsy" character or going as an English peasant to play in the dirt and have fun. As you can see, I use quotes for the word gypsy because it is a known fact that most who are labeled as such are the Romani who view this word as a slander or slur against them. They are offended by the word, but I use it so people can easily identify a person's character in these renaissance reenactments. So, back to the topic at hand.
I've been gathering my costume pieces together to figure out what I will be wearing and have decided on a brown/beige stripped ghawazee vest I made a few weeks ago (never been used), black harem pants, a chevron pattern tassel belt I made earlier this year and a white top with embroidery around the neck and edges of the sleeves. The costume looks great together, but looking in the mirror I had realized that I am missing an important key factor. The head. What was I going to do with my hair? What was I going to cover my head with? During the renaissance times, "gypsies" and most other cultures had their heads covered both for religious and culture reasons. This does include the English as well. I had to come up with an option to have my head covered and I didn't know where to start. Then it hit me. I could use a turban. Not only will this keep the hair back, but it will prevent the top of my head getting burned since I will be out in the sun all day. My next step was to find out how to make a turban.
Now when you see pictures, you often wonder how turbans are made for dancing. A lot of times you can use an existing scarf you may own or find a cheapy one at Walmart that may work. Other times people may use scrap material from their sewing to make these. Either way, you will need a long rectangular shaped fabric piece in order to make this work. It will need to be wide enough that the beginning point starts at your forehead and travels down to the nape of your neck. The length doesn't matter as long as it is long enough to wrap around your head a few times.
In doing some research on the turban tying and the different ways to tie a turban, I found a wonderful woman on YouTube who does an excellent job of breaking down the steps to tying a turban in not only one style, but three. Below you can watch all three videos she produced.
Any one of these will make the turban secure and give you a look you can play with for performing or as a character you may play for renaissance fairs or parties. You can even go as far as using a couple of scarves to accent colors and textures reflected in your costume. These would need to be varying lengths so you don't have so much fabric to wrap around. The last thing you would want is to have a giant turban on and have your head look tiny. For the base scarf, you will want to be able to wrap it around your head once before tucking the ends and going on to the next scarf which may be longer if you wish to wrap this one around your head 2 times.
Once the turban is on, you can now start playing with looks. You can have feathers, tribal belt/jewelry pieces or pins stuck to the turban to add some flare. I have seen some women who have taken simple tribal belts and tied those around their heads (while tucking the strings away in the turban) to give a nice middle eastern exotic look. The possibilities are endless, it just depends on what you can come up with to make it work for what you are wearing.
Try it out and have fun!
I've been gathering my costume pieces together to figure out what I will be wearing and have decided on a brown/beige stripped ghawazee vest I made a few weeks ago (never been used), black harem pants, a chevron pattern tassel belt I made earlier this year and a white top with embroidery around the neck and edges of the sleeves. The costume looks great together, but looking in the mirror I had realized that I am missing an important key factor. The head. What was I going to do with my hair? What was I going to cover my head with? During the renaissance times, "gypsies" and most other cultures had their heads covered both for religious and culture reasons. This does include the English as well. I had to come up with an option to have my head covered and I didn't know where to start. Then it hit me. I could use a turban. Not only will this keep the hair back, but it will prevent the top of my head getting burned since I will be out in the sun all day. My next step was to find out how to make a turban.
Now when you see pictures, you often wonder how turbans are made for dancing. A lot of times you can use an existing scarf you may own or find a cheapy one at Walmart that may work. Other times people may use scrap material from their sewing to make these. Either way, you will need a long rectangular shaped fabric piece in order to make this work. It will need to be wide enough that the beginning point starts at your forehead and travels down to the nape of your neck. The length doesn't matter as long as it is long enough to wrap around your head a few times.
In doing some research on the turban tying and the different ways to tie a turban, I found a wonderful woman on YouTube who does an excellent job of breaking down the steps to tying a turban in not only one style, but three. Below you can watch all three videos she produced.
Any one of these will make the turban secure and give you a look you can play with for performing or as a character you may play for renaissance fairs or parties. You can even go as far as using a couple of scarves to accent colors and textures reflected in your costume. These would need to be varying lengths so you don't have so much fabric to wrap around. The last thing you would want is to have a giant turban on and have your head look tiny. For the base scarf, you will want to be able to wrap it around your head once before tucking the ends and going on to the next scarf which may be longer if you wish to wrap this one around your head 2 times.
Once the turban is on, you can now start playing with looks. You can have feathers, tribal belt/jewelry pieces or pins stuck to the turban to add some flare. I have seen some women who have taken simple tribal belts and tied those around their heads (while tucking the strings away in the turban) to give a nice middle eastern exotic look. The possibilities are endless, it just depends on what you can come up with to make it work for what you are wearing.
Try it out and have fun!
Saturday, June 30, 2012
Faces + Bodies = Expression
Came across a post on Shira's bellydance page, All About Belly Dancing, by Shira. I thought I would share this as I feel this should be a standard that all teachers of all dance styles should be open to. Not just because it allows the student to grow more, but because as a teacher you are promoting members of your dance community which results in positive experiences for everyone and as a teacher you want to see your students come to their full potential. So here is the article:
To All Students,
Regarding "Loyalty" to Your Teacher
By Amanda Niehaus
Dear students of this beautiful art form,
I am a teacher. I teach because I am passionate about this dance and I want others to share my passion.
I am not teaching because I require a fan club.
I am not teaching because I require devotees or because I need hero worship.
As your teacher, my job is to teach you; to inspire you to be your best. If I am a really good teacher, then I also will not be your only teacher. I will encourage you to study with other teachers who have skills and experience I lack. Because I am not the end-all, be-all of belly dance knowledge.
You as a student owe me nothing. You may thank me after class, you may credit me on your first performance dvd, you may remember me when you are touring with Jillina, but you do not owe me anything. (You paid for your class. I taught you. We are even.)
I am an emotionally-mature adult (for the most part). I do not require your "loyalty" or allegiance. You do not have to take my classes just because I offer them, or just because I was your first teacher. You will not be "cheating on" me by taking classes with another instructor.
You should be taking my class because you enjoy it and are learning something. If you are no longer enjoying it or learning from it, then I would be the first to encourage you to find another, or a different, teacher. I want you to love this dance as much as I do.
Your job is to learn and practice, not to worry about my ego. I will not be "mad" at you for moving to a new level with your dance. You need to worry about YOU, and making yourself a better dancer. I will never resent you and I will only respect you for moving onward and upward.
Do what's right for you. I'll be fine, whether I'm dancing beside you or watching you from the audience. I promise.
Yours truly,
Your dance teacher
On to other things, I came across this video of Zoe Jakes and Kami Liddle performing in Las Vegas, Nevada last year and I was so mesmerized by their performance that I really wanted to share.
Now I have to admit, I've always been attracted to tribal fusion bellydancing. There is just something so fluid with the movements and the skill of solid isolations that makes it so much fun to watch. My problem is that I just don't have the body size to really do this type of bellydance style nor the skill level. Although I am a firm believer that a dancer should not be cast out because of their size, there are just some movements that us plus-size dancers cannot do where the emphasis of movements gets lost. It's a sad thing that we have to accept this about our body size, but we do still excel in many forms of bellydancing and there are indeed moves that we do tend to execute better than dancers who fit the general ideal of what a bellydancer should look like. But one thing people should understand is that even though a dancer has the body, they don't always have the skill. I have seen plenty of dancers, through live performances and video, where they have the "perfect" body but lack the finess and skill. It's like taking someone who would fit the part because they are the right size to fit the costume being provided, but not the skill to make the look work. One thing I have noticed is that there are dancers out there that have been dancing for a while who neglect to be aware of their own body. Whether you are tall, medium, short, thin, large, oddly shaped, perfectly shaped, disabled in some way or in excellent health, we all need to be fully aware of what attributes we want to emphasis the most and use our disadvantages in ways that make us unique and appealing when we dance. Obviously you don't want to flaunt your weaknesses, but if you choose movements that are easier on your body for whatever limitation you have it actually makes it so much easier to enjoy dancing without the stress of enduring pain when doing movements that are hard to endure. Never be afraid to modify a move to accommodate what your body just simply can't do. You should never feel like you have to do a move the exact way it's being taught if you are limited due to injuries, disabilities or lack of flexibility. As long as you can do the move in a way that works for you, you should be just fine and people watching will enjoy your performance without knowing you had modified anything. Especially other dancers.
One thing I would really like to emphasize is your face when you perform. If you don't look like you are enjoying yourself, then no one will. I have danced with a few people who rarely smile. It's a serious face all the time and, in all honesty, it turns off the audience. You want the audience to be engaged in what you do, not watch you and wonder when you will be done because you look like you are doing a chore rather than showing how much you enjoy dancing. If you need to, start smiling when you practice. Whether you are at home or in class drilling, just smile. There are instances where smiling is not a requirement and it is all based on the mood of your dance. If it's dramatic and/or dark in nature, you don't want to be smiling, but you can still be expressive with your face. Below are examples of dancers who have the proper faces for the style/mood that they are dancing.
As you can see, not all of these dancers are showing a bright smile like the dancer in the first picture. But variations of smiles, smirks or even an intense look is bringing some sort of expression to your face that will help add to the mood your dancing. Here is an article from Ruri-Amari Dance: The Blog that discusses facial expressions that will help you improve your face from showing no emotion/pursed lips to a very emotional/expressive face:
Belly Dance – Head Orientation and Facial Expression Control
Posted on November 20, 2010 by AnnaBeth
We are dancers. We can control our hips, torsos, and arms like nobody else… but what about our most expressive body part? The body part which portrays our mood and intent in every day situations? I’m talking about your face! You can do the most joyous, bouncy dance in the world, but if your face is upset, angry, or sad… your audience will hone in on that feeling. Try it out: Get a friend. Perform for her a serious dance with a serious face. Then do the same exact dance with a goofy face, or a sarcastic smirk, or a huge smile. Ask her how each dance made her feel. Which did she like better?
How important is your face? You can do the most spectacular dance ever, but if your face shows boredom or lack of intent, your audience will pick up on it and get bored. Conversely, you can use your face to work in your favor. If balancing a sword, basket, or candle on your head is no big deal (you could do it in your sleep with one hand behind your back), you can express such concentration with your face that your audience will be on the edge of their seats! Some things to remember:
- Your facial expression shows the intent of your dance more than any other body part (sad, thoughtful, joyous, contemplative, dark, lighthearted).
- Your face can show the audience where to look. Raise one arm and do a hip shimmy. If you are looking at your arm, so is your audience. If you are looking at your hip, so is your audience.
- Your face will betray you… not your moves! If you ‘mess up’, chances are nobody will know unless you make that “oh crap!” face.
People subconsciously know the difference between a fake smile and a real one. “When a person genuinely smiles, the orbicularis oculi and the pars orbitalis contract in addition to zygomaticus major, causing the cheeks to raise and the skin around the eyes to crease.”(http://www.wisegeek.com/how-do-i-identify-a-fake-smile.htm) A large smile with eyes which are fearful or confused will make your audience uneasy.
So what can we do? What we always do… Practice! First of all, you will need a friend. Trust me. You can’t watch your face accurately while dancing. If you have no friends (wah!), you can use a video camera.
Exercise 1: Facial Twitches
If you have a dance partner, or someone who has seen you dance a lot, you can just ask them “What strange things do I do with my face while dancing?” If you don’t, then dance some dances for them and then ask. You may be surprised at what they say. Maybe you bite your lip or purse your lips, maybe you make really obvious fake smiles, maybe you blink a lot, or maybe you whisper to yourself (it does happen!). Your first reaction will be “I don’t do that!” Believe me, you do. Whatever they say, they wouldn’t lie to you. Now you know, and knowing is half the battle! =)
Exercise 2: Gaining Control of your Face
This exercise sounds easy, but it isn’t! Do a dance (choreographed or improvised) and don’t use your head or face. Look straight forward the entire time and don’t make any facial expressions. A friend comes in really handy here. They can tell you when you look to the side or make a face. You can’t trust yourself to catch it… you really need someone to tell you when you get off track.
Exercise 3: Intent
Before you do a dance, decide on your intent. What are you trying to say with this dance? If your inner goal is to ‘just make it through this dance’, then that is what will show on your face. Practice! While you practice your dances, pay attention to what you are saying with your face. Where are you looking? Is that where you want to be looking? Where should your audience look? Is your head orientation reflecting that? What should your audience be feeling? Are your facial expressions showing that? Remember, what you do in practice will come out in a performance.
Exercise 3: Choreograph a Look
In your next choreographed piece, add a head orientation to your dance. This can be especially powerful in group dances. There is something that produces chills when everyone, as a unit, moves their head in a precise look.
Like every other body part and every muscle, we need to condition our heads and faces. Don’t overlook this important aspect of your dance!
Always practice what face you are wanting to express based on what mood you are expressing. You may be surprised to find that you are more appealing to watch when you execute a look that captivates your audience. Remember, human beings base our emotions on what we see. If someone is showing an emotion, we are able to identify with that expression and know how they are feeling. As an example, I will display a picture of myself performing where it is obvious to tell I am not sure of what I am performing. Keep in mind that because I didn't know this choreography, I was basing all my moves on the queues being given by those in front of me and that this does show on my face:
This is proof that even though you may not know the choreography, you got to learn how to watch for queues without giving it away on your face.
So here is an assignment for you. Go look in the mirror and start practicing your faces for when you perform. Practice these faces while you practice your dance at home or in class. If it helps, play the music you are dancing to while looking in the mirror as you work on your facial work. The music will help you feel the emotion you want to show. You may be surprised when you look at the next set of pictures or videos taken of you at your next performance!
To All Students,
Regarding "Loyalty" to Your Teacher
By Amanda Niehaus
Dear students of this beautiful art form,
I am a teacher. I teach because I am passionate about this dance and I want others to share my passion.
I am not teaching because I require a fan club.
I am not teaching because I require devotees or because I need hero worship.
As your teacher, my job is to teach you; to inspire you to be your best. If I am a really good teacher, then I also will not be your only teacher. I will encourage you to study with other teachers who have skills and experience I lack. Because I am not the end-all, be-all of belly dance knowledge.
You as a student owe me nothing. You may thank me after class, you may credit me on your first performance dvd, you may remember me when you are touring with Jillina, but you do not owe me anything. (You paid for your class. I taught you. We are even.)
I am an emotionally-mature adult (for the most part). I do not require your "loyalty" or allegiance. You do not have to take my classes just because I offer them, or just because I was your first teacher. You will not be "cheating on" me by taking classes with another instructor.
You should be taking my class because you enjoy it and are learning something. If you are no longer enjoying it or learning from it, then I would be the first to encourage you to find another, or a different, teacher. I want you to love this dance as much as I do.
Your job is to learn and practice, not to worry about my ego. I will not be "mad" at you for moving to a new level with your dance. You need to worry about YOU, and making yourself a better dancer. I will never resent you and I will only respect you for moving onward and upward.
Do what's right for you. I'll be fine, whether I'm dancing beside you or watching you from the audience. I promise.
Yours truly,
Your dance teacher
On to other things, I came across this video of Zoe Jakes and Kami Liddle performing in Las Vegas, Nevada last year and I was so mesmerized by their performance that I really wanted to share.
Now I have to admit, I've always been attracted to tribal fusion bellydancing. There is just something so fluid with the movements and the skill of solid isolations that makes it so much fun to watch. My problem is that I just don't have the body size to really do this type of bellydance style nor the skill level. Although I am a firm believer that a dancer should not be cast out because of their size, there are just some movements that us plus-size dancers cannot do where the emphasis of movements gets lost. It's a sad thing that we have to accept this about our body size, but we do still excel in many forms of bellydancing and there are indeed moves that we do tend to execute better than dancers who fit the general ideal of what a bellydancer should look like. But one thing people should understand is that even though a dancer has the body, they don't always have the skill. I have seen plenty of dancers, through live performances and video, where they have the "perfect" body but lack the finess and skill. It's like taking someone who would fit the part because they are the right size to fit the costume being provided, but not the skill to make the look work. One thing I have noticed is that there are dancers out there that have been dancing for a while who neglect to be aware of their own body. Whether you are tall, medium, short, thin, large, oddly shaped, perfectly shaped, disabled in some way or in excellent health, we all need to be fully aware of what attributes we want to emphasis the most and use our disadvantages in ways that make us unique and appealing when we dance. Obviously you don't want to flaunt your weaknesses, but if you choose movements that are easier on your body for whatever limitation you have it actually makes it so much easier to enjoy dancing without the stress of enduring pain when doing movements that are hard to endure. Never be afraid to modify a move to accommodate what your body just simply can't do. You should never feel like you have to do a move the exact way it's being taught if you are limited due to injuries, disabilities or lack of flexibility. As long as you can do the move in a way that works for you, you should be just fine and people watching will enjoy your performance without knowing you had modified anything. Especially other dancers.
One thing I would really like to emphasize is your face when you perform. If you don't look like you are enjoying yourself, then no one will. I have danced with a few people who rarely smile. It's a serious face all the time and, in all honesty, it turns off the audience. You want the audience to be engaged in what you do, not watch you and wonder when you will be done because you look like you are doing a chore rather than showing how much you enjoy dancing. If you need to, start smiling when you practice. Whether you are at home or in class drilling, just smile. There are instances where smiling is not a requirement and it is all based on the mood of your dance. If it's dramatic and/or dark in nature, you don't want to be smiling, but you can still be expressive with your face. Below are examples of dancers who have the proper faces for the style/mood that they are dancing.
As you can see, not all of these dancers are showing a bright smile like the dancer in the first picture. But variations of smiles, smirks or even an intense look is bringing some sort of expression to your face that will help add to the mood your dancing. Here is an article from Ruri-Amari Dance: The Blog that discusses facial expressions that will help you improve your face from showing no emotion/pursed lips to a very emotional/expressive face:
Belly Dance – Head Orientation and Facial Expression Control
Posted on November 20, 2010 by AnnaBeth
We are dancers. We can control our hips, torsos, and arms like nobody else… but what about our most expressive body part? The body part which portrays our mood and intent in every day situations? I’m talking about your face! You can do the most joyous, bouncy dance in the world, but if your face is upset, angry, or sad… your audience will hone in on that feeling. Try it out: Get a friend. Perform for her a serious dance with a serious face. Then do the same exact dance with a goofy face, or a sarcastic smirk, or a huge smile. Ask her how each dance made her feel. Which did she like better?
How important is your face? You can do the most spectacular dance ever, but if your face shows boredom or lack of intent, your audience will pick up on it and get bored. Conversely, you can use your face to work in your favor. If balancing a sword, basket, or candle on your head is no big deal (you could do it in your sleep with one hand behind your back), you can express such concentration with your face that your audience will be on the edge of their seats! Some things to remember:
- Your facial expression shows the intent of your dance more than any other body part (sad, thoughtful, joyous, contemplative, dark, lighthearted).
- Your face can show the audience where to look. Raise one arm and do a hip shimmy. If you are looking at your arm, so is your audience. If you are looking at your hip, so is your audience.
- Your face will betray you… not your moves! If you ‘mess up’, chances are nobody will know unless you make that “oh crap!” face.
People subconsciously know the difference between a fake smile and a real one. “When a person genuinely smiles, the orbicularis oculi and the pars orbitalis contract in addition to zygomaticus major, causing the cheeks to raise and the skin around the eyes to crease.”(http://www.wisegeek.com/how-do-i-identify-a-fake-smile.htm) A large smile with eyes which are fearful or confused will make your audience uneasy.
So what can we do? What we always do… Practice! First of all, you will need a friend. Trust me. You can’t watch your face accurately while dancing. If you have no friends (wah!), you can use a video camera.
Exercise 1: Facial Twitches
If you have a dance partner, or someone who has seen you dance a lot, you can just ask them “What strange things do I do with my face while dancing?” If you don’t, then dance some dances for them and then ask. You may be surprised at what they say. Maybe you bite your lip or purse your lips, maybe you make really obvious fake smiles, maybe you blink a lot, or maybe you whisper to yourself (it does happen!). Your first reaction will be “I don’t do that!” Believe me, you do. Whatever they say, they wouldn’t lie to you. Now you know, and knowing is half the battle! =)
Exercise 2: Gaining Control of your Face
This exercise sounds easy, but it isn’t! Do a dance (choreographed or improvised) and don’t use your head or face. Look straight forward the entire time and don’t make any facial expressions. A friend comes in really handy here. They can tell you when you look to the side or make a face. You can’t trust yourself to catch it… you really need someone to tell you when you get off track.
Exercise 3: Intent
Before you do a dance, decide on your intent. What are you trying to say with this dance? If your inner goal is to ‘just make it through this dance’, then that is what will show on your face. Practice! While you practice your dances, pay attention to what you are saying with your face. Where are you looking? Is that where you want to be looking? Where should your audience look? Is your head orientation reflecting that? What should your audience be feeling? Are your facial expressions showing that? Remember, what you do in practice will come out in a performance.
Exercise 3: Choreograph a Look
In your next choreographed piece, add a head orientation to your dance. This can be especially powerful in group dances. There is something that produces chills when everyone, as a unit, moves their head in a precise look.
Like every other body part and every muscle, we need to condition our heads and faces. Don’t overlook this important aspect of your dance!
Always practice what face you are wanting to express based on what mood you are expressing. You may be surprised to find that you are more appealing to watch when you execute a look that captivates your audience. Remember, human beings base our emotions on what we see. If someone is showing an emotion, we are able to identify with that expression and know how they are feeling. As an example, I will display a picture of myself performing where it is obvious to tell I am not sure of what I am performing. Keep in mind that because I didn't know this choreography, I was basing all my moves on the queues being given by those in front of me and that this does show on my face:
This is proof that even though you may not know the choreography, you got to learn how to watch for queues without giving it away on your face.
So here is an assignment for you. Go look in the mirror and start practicing your faces for when you perform. Practice these faces while you practice your dance at home or in class. If it helps, play the music you are dancing to while looking in the mirror as you work on your facial work. The music will help you feel the emotion you want to show. You may be surprised when you look at the next set of pictures or videos taken of you at your next performance!
Subscribe to:
Posts (Atom)